1. Get started
The three-page welcome introduces moods, the daily timeline, and frames. It appears only on your first launch unless you choose to replay it later.
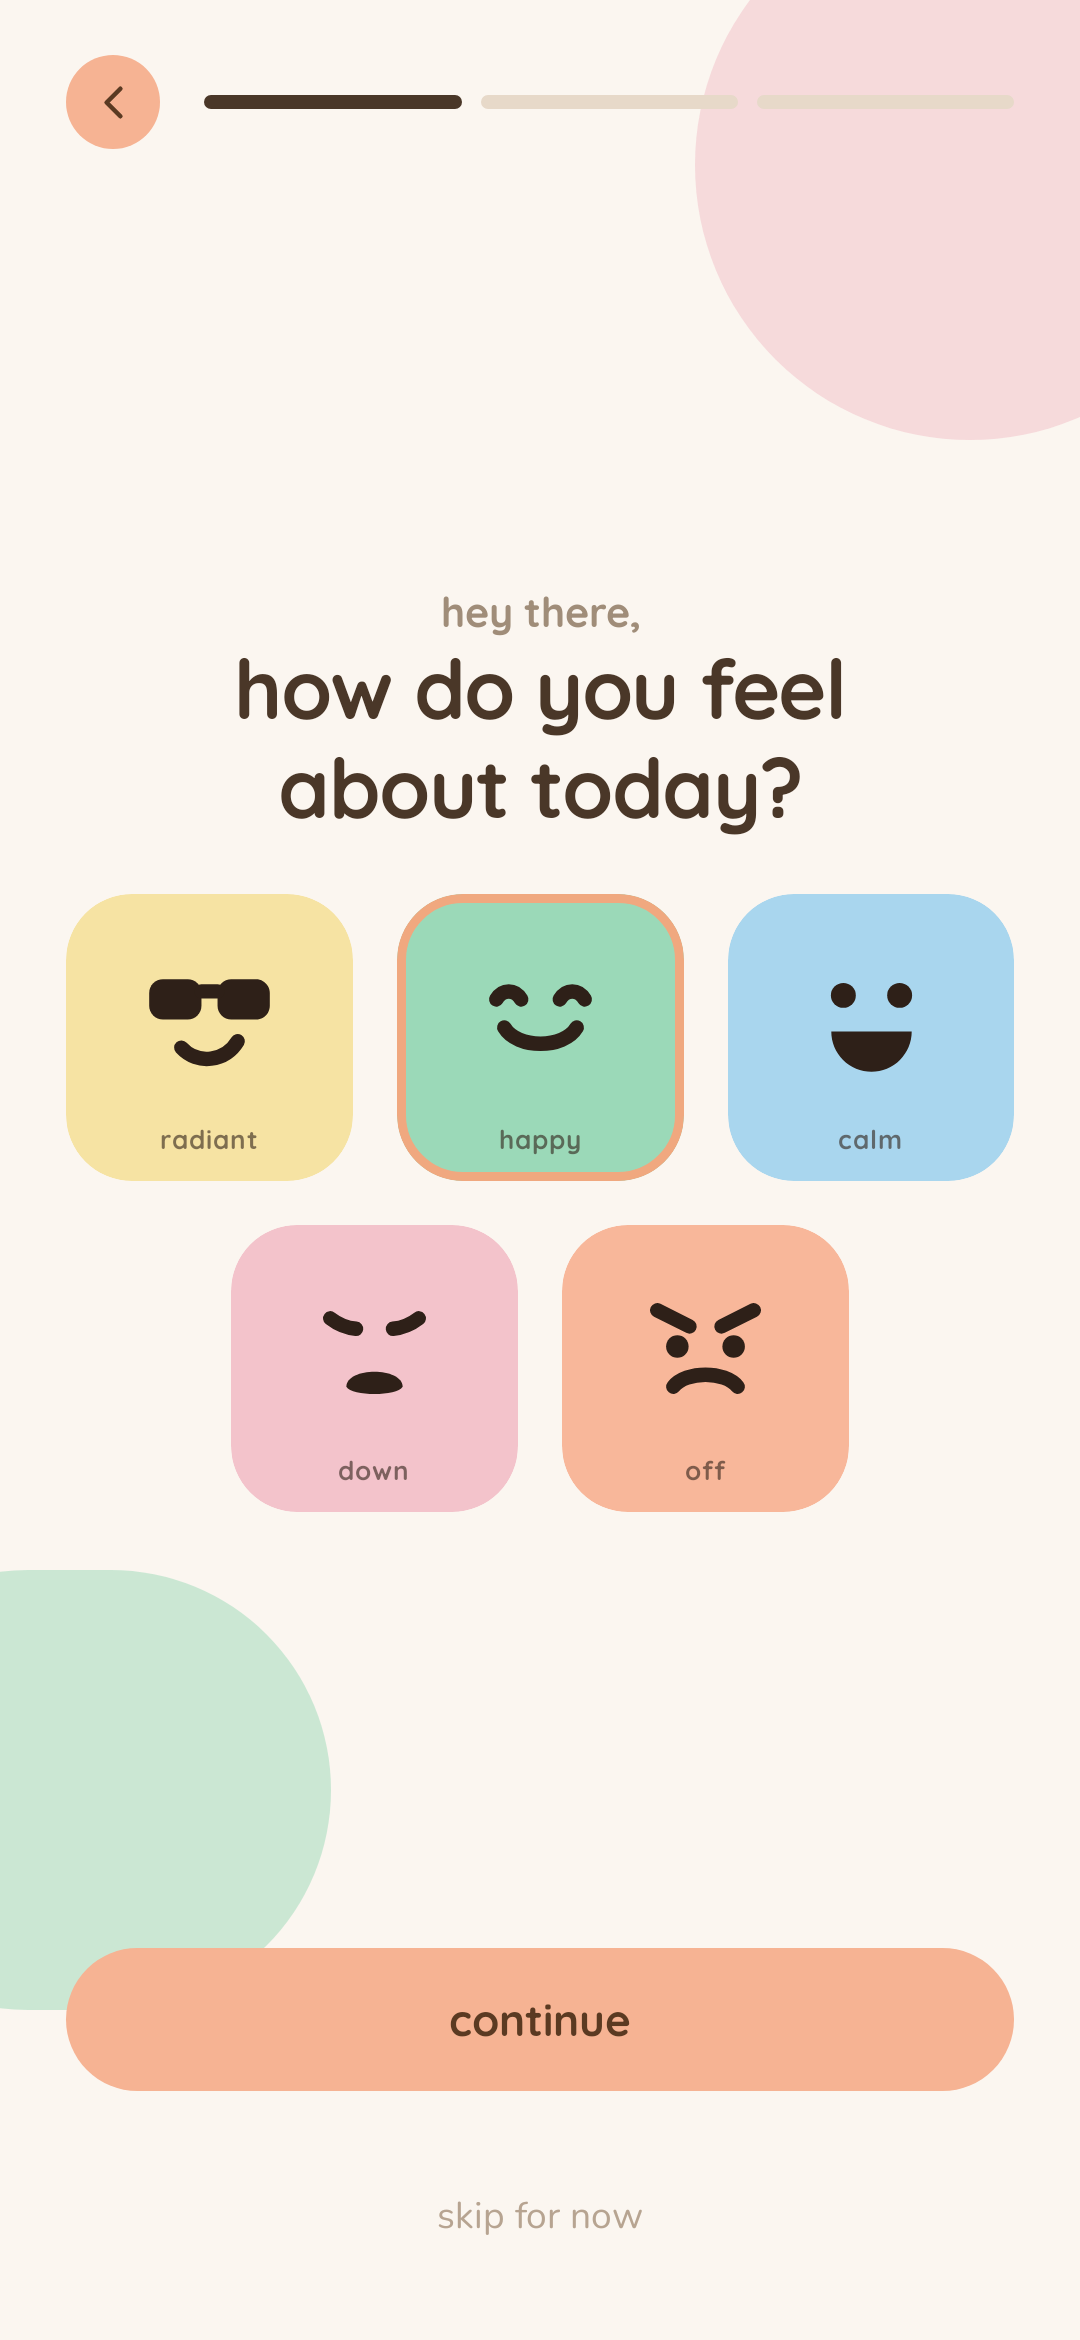
- Step 1: Open Loggoo and answer “how do you feel about today?” if you want to preview a mood. This choice does not add anything to your journal.
- Step 2: Tap “continue” or swipe to learn how moments collect into one day.
- Step 3: On the last page, tap “start my first day”. You can also tap “skip for now” at any point.
- Step 4: On Home, use the day view for today’s timeline and the month view for your calendar.
2. Capture a photo or video
The camera is the fastest way to add a moment. Photos are available to everyone; short video capture requires Loggoo Plus and supported hardware.
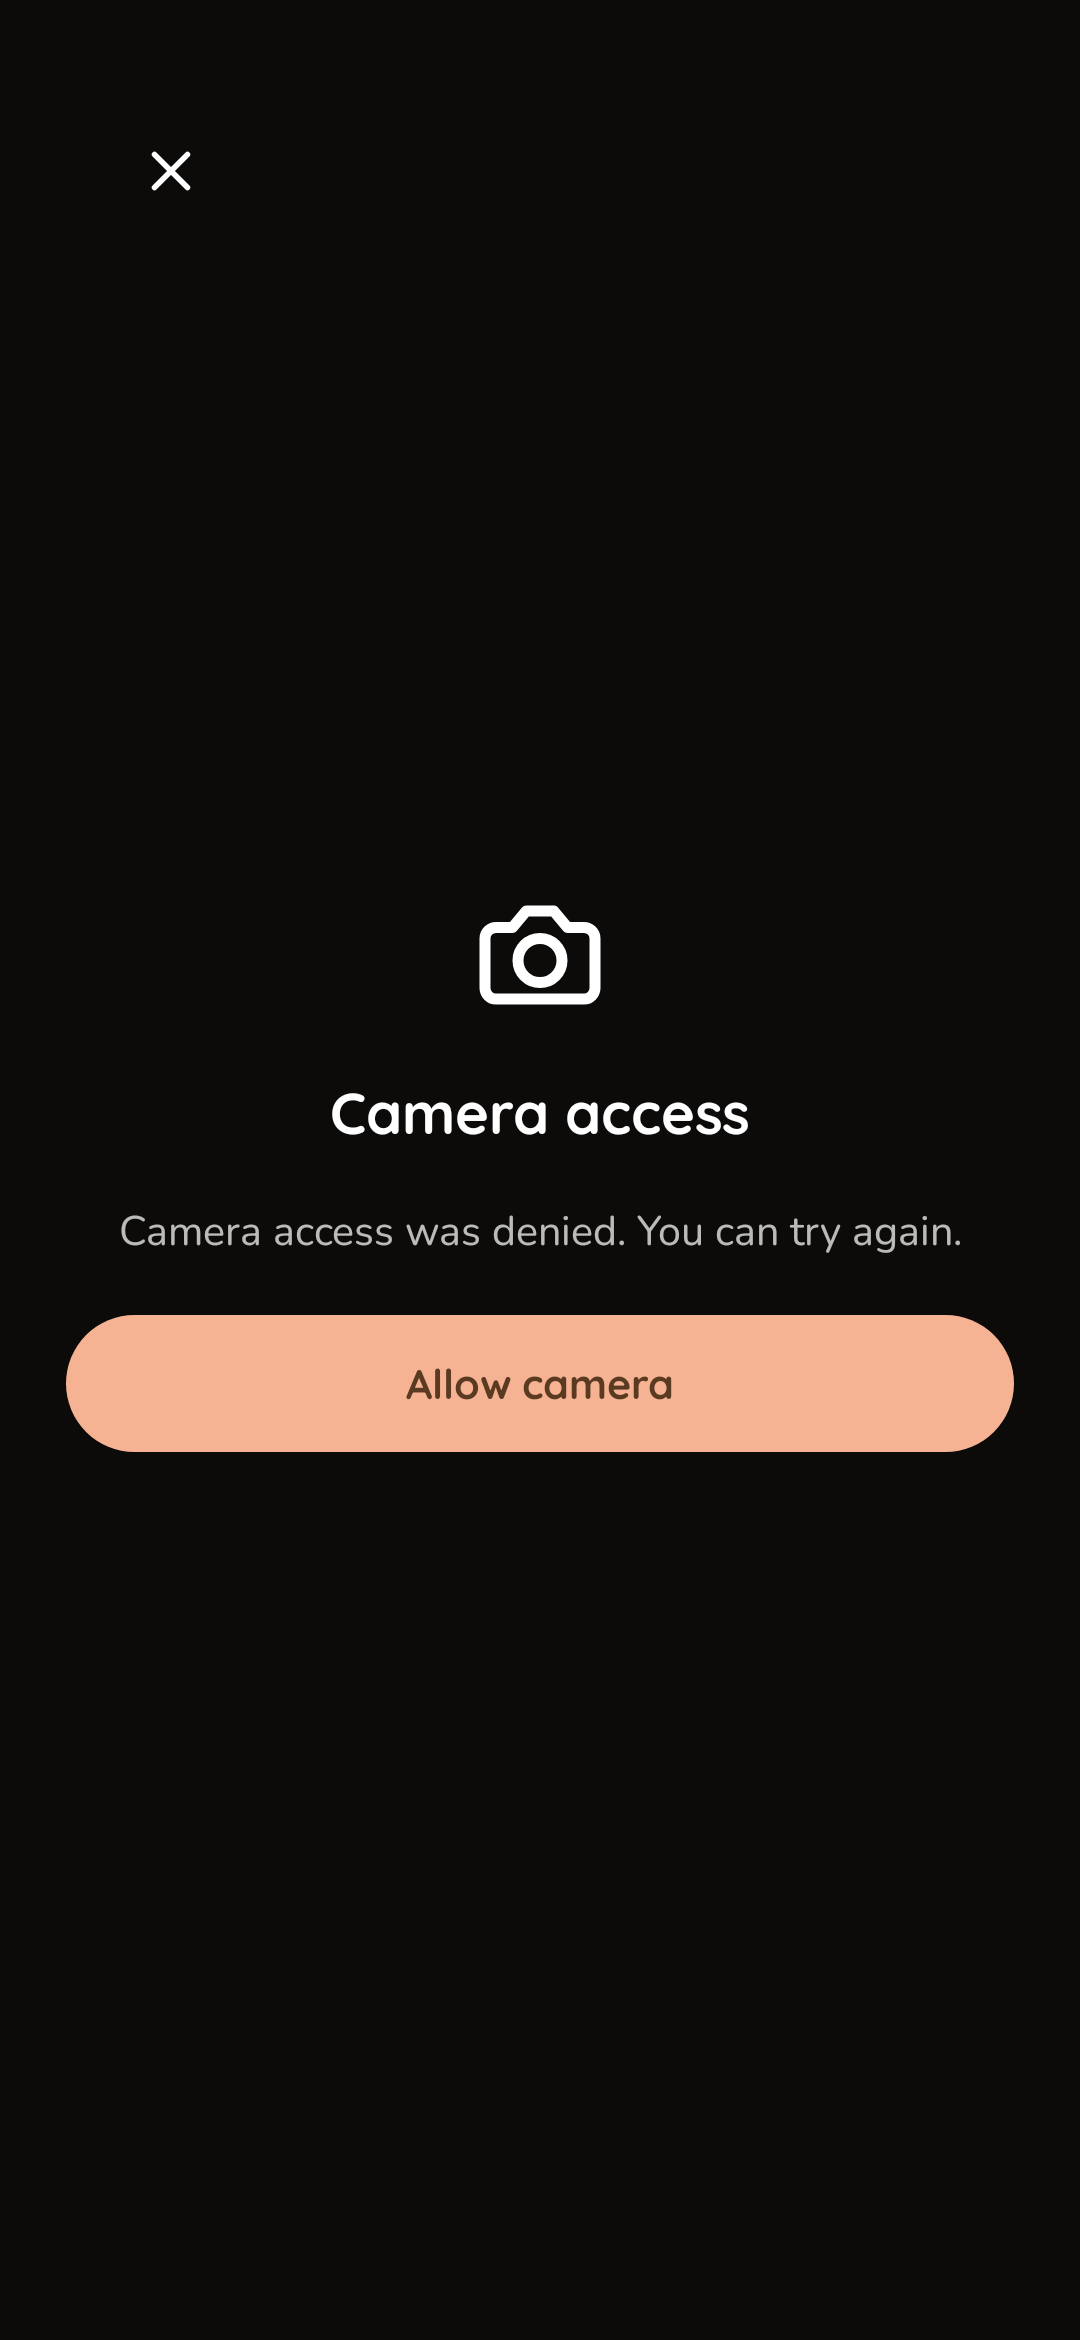
- Step 1: From Home, tap the camera button or “take a photo”. Allow camera access when iOS asks.
- Step 2: Tap the preview to focus, pinch to zoom, use the flash control, or switch between the front and back cameras.
- Step 3: Tap the shutter for a photo. With Loggoo Plus, press and hold the shutter to record a short video, then release to stop.
- Step 4: You can also tap the photo-library button to choose existing pictures. Select up to the limit shown on screen.
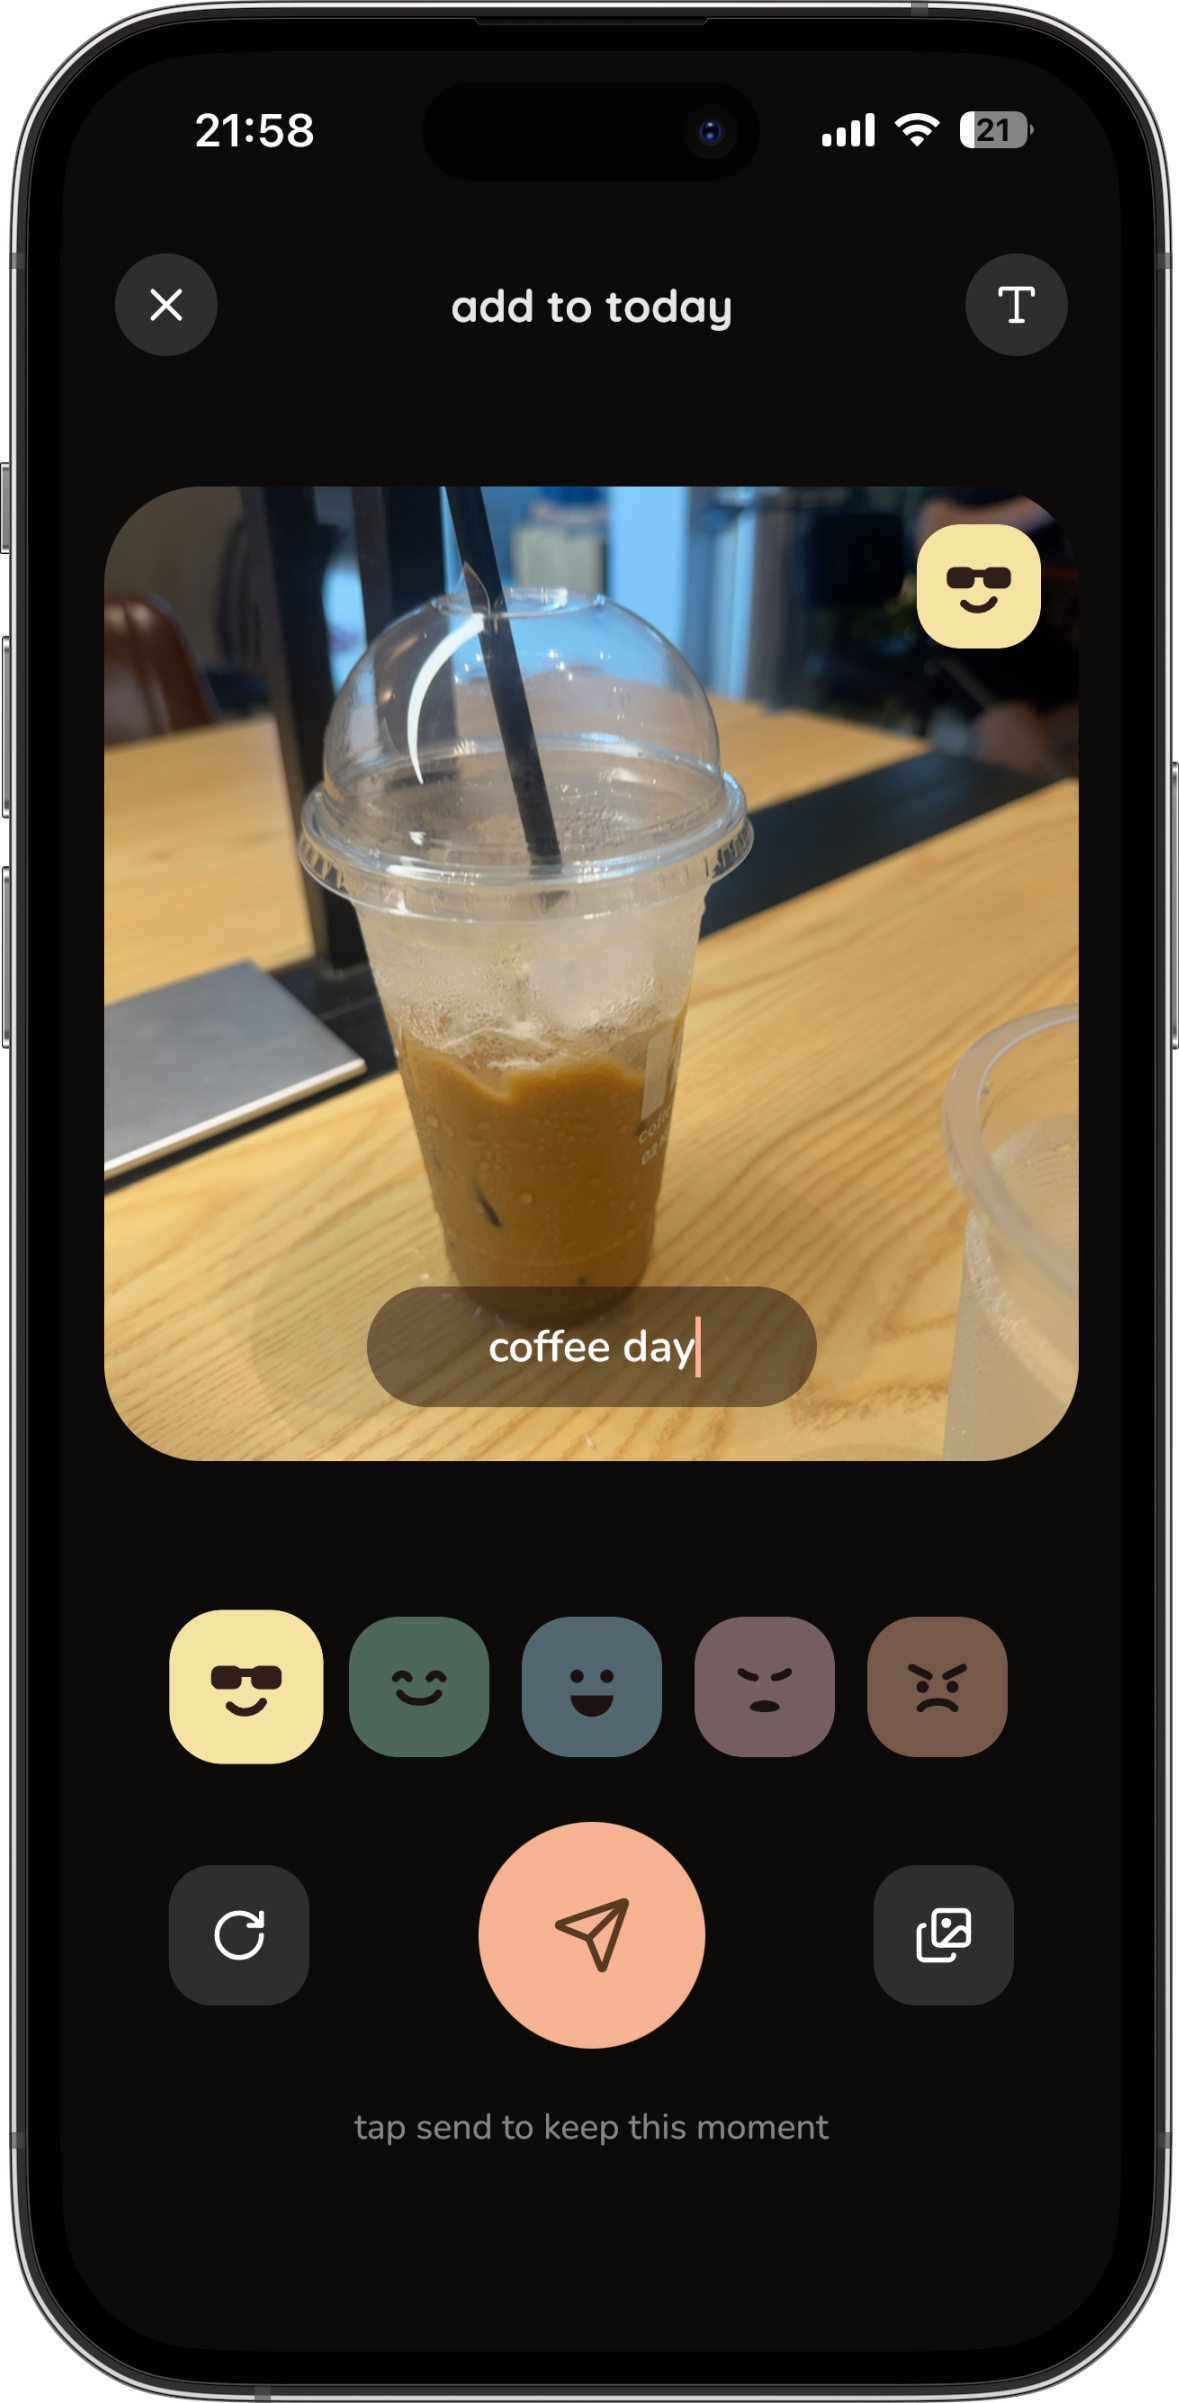
- Step 5: Review the result. Tap “Retake” if needed, or continue to the composer.
- Step 6: Optionally add a short note and choose a mood, then tap “save moment”.
3. Add a mood or note
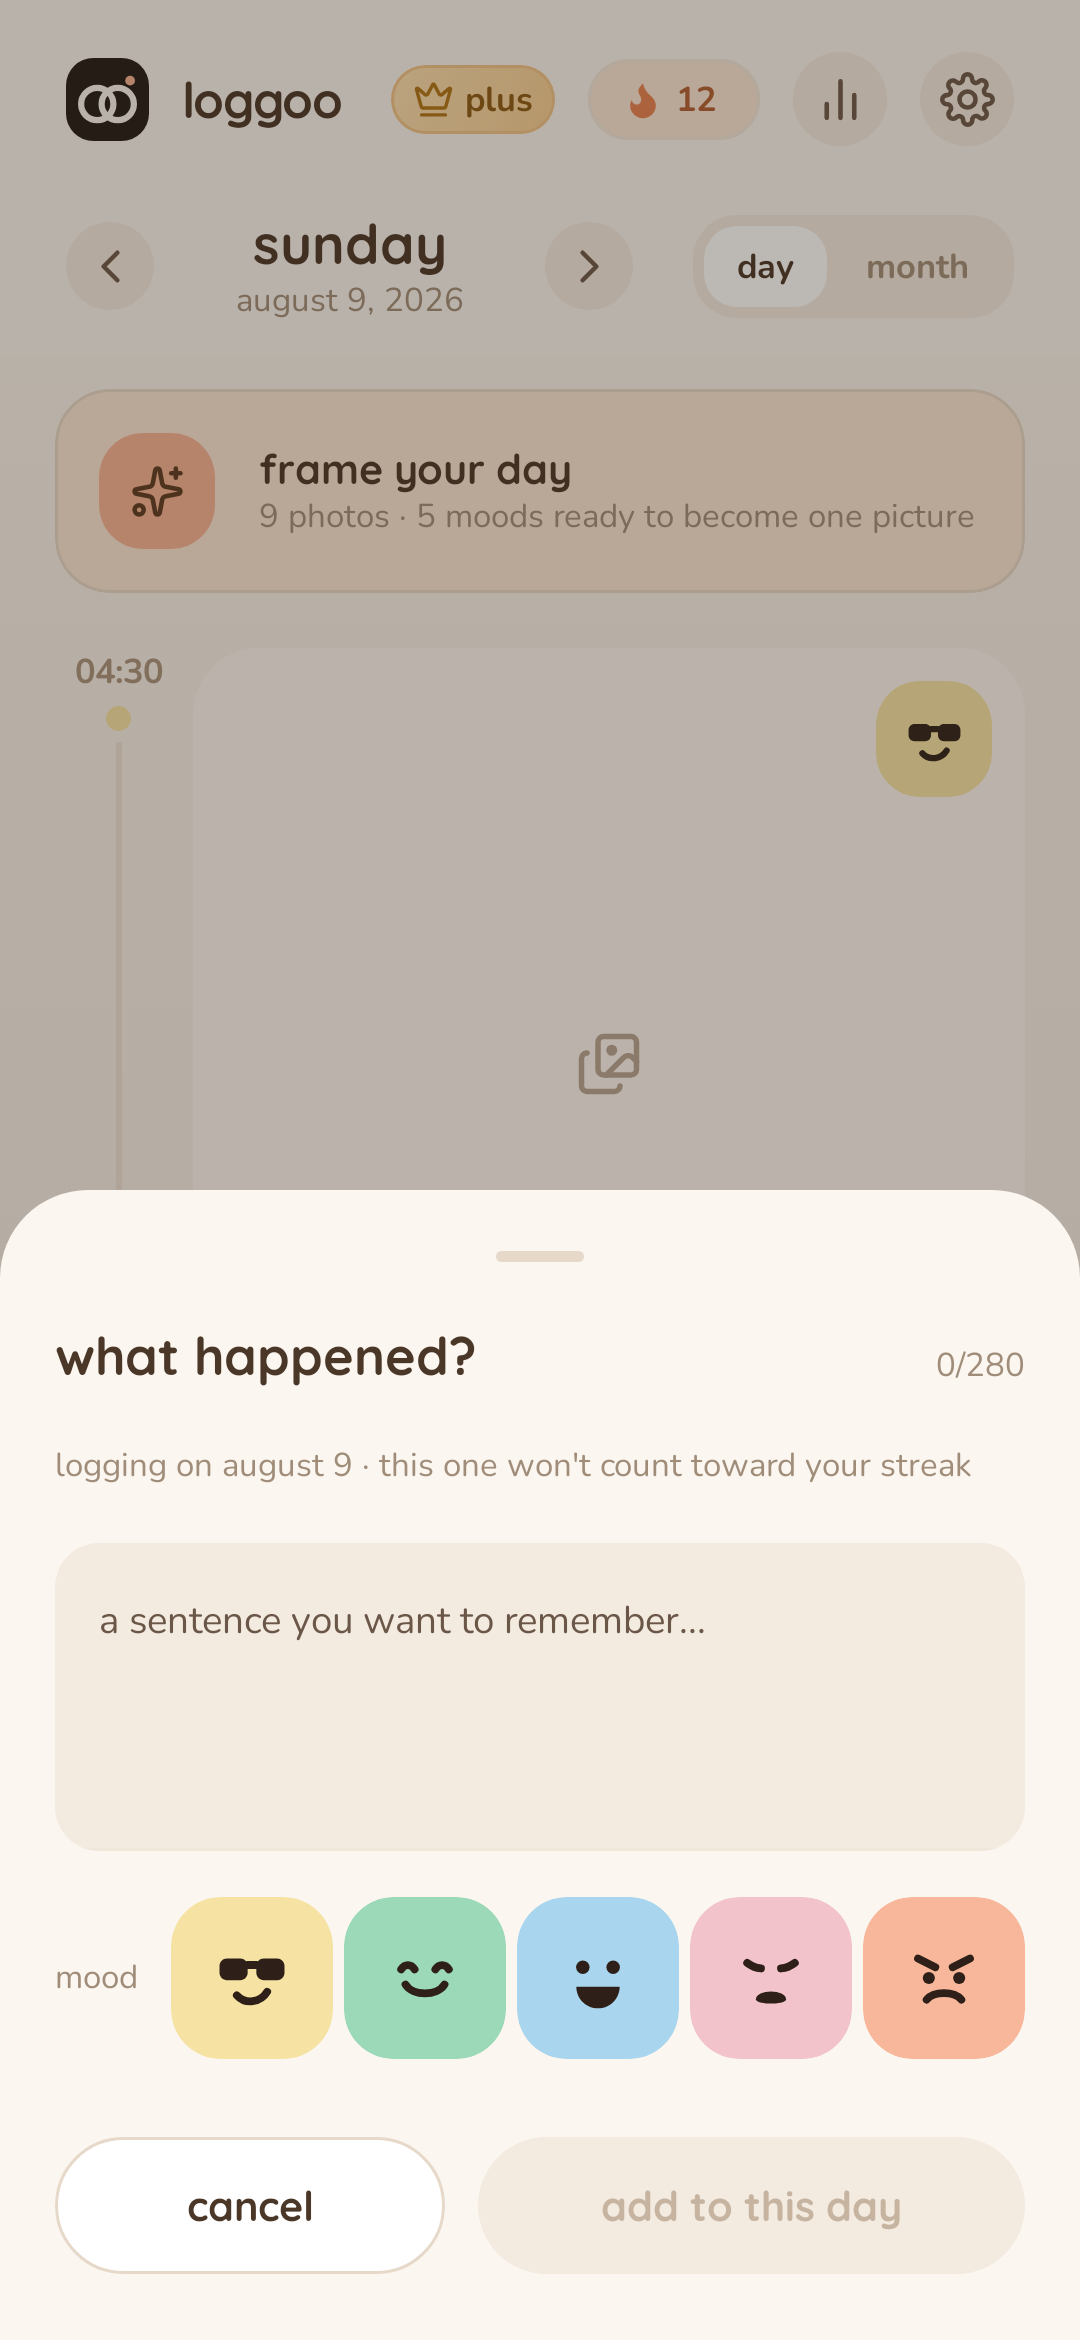
A day does not need a photo. A mood or one sentence is enough to keep it from disappearing.
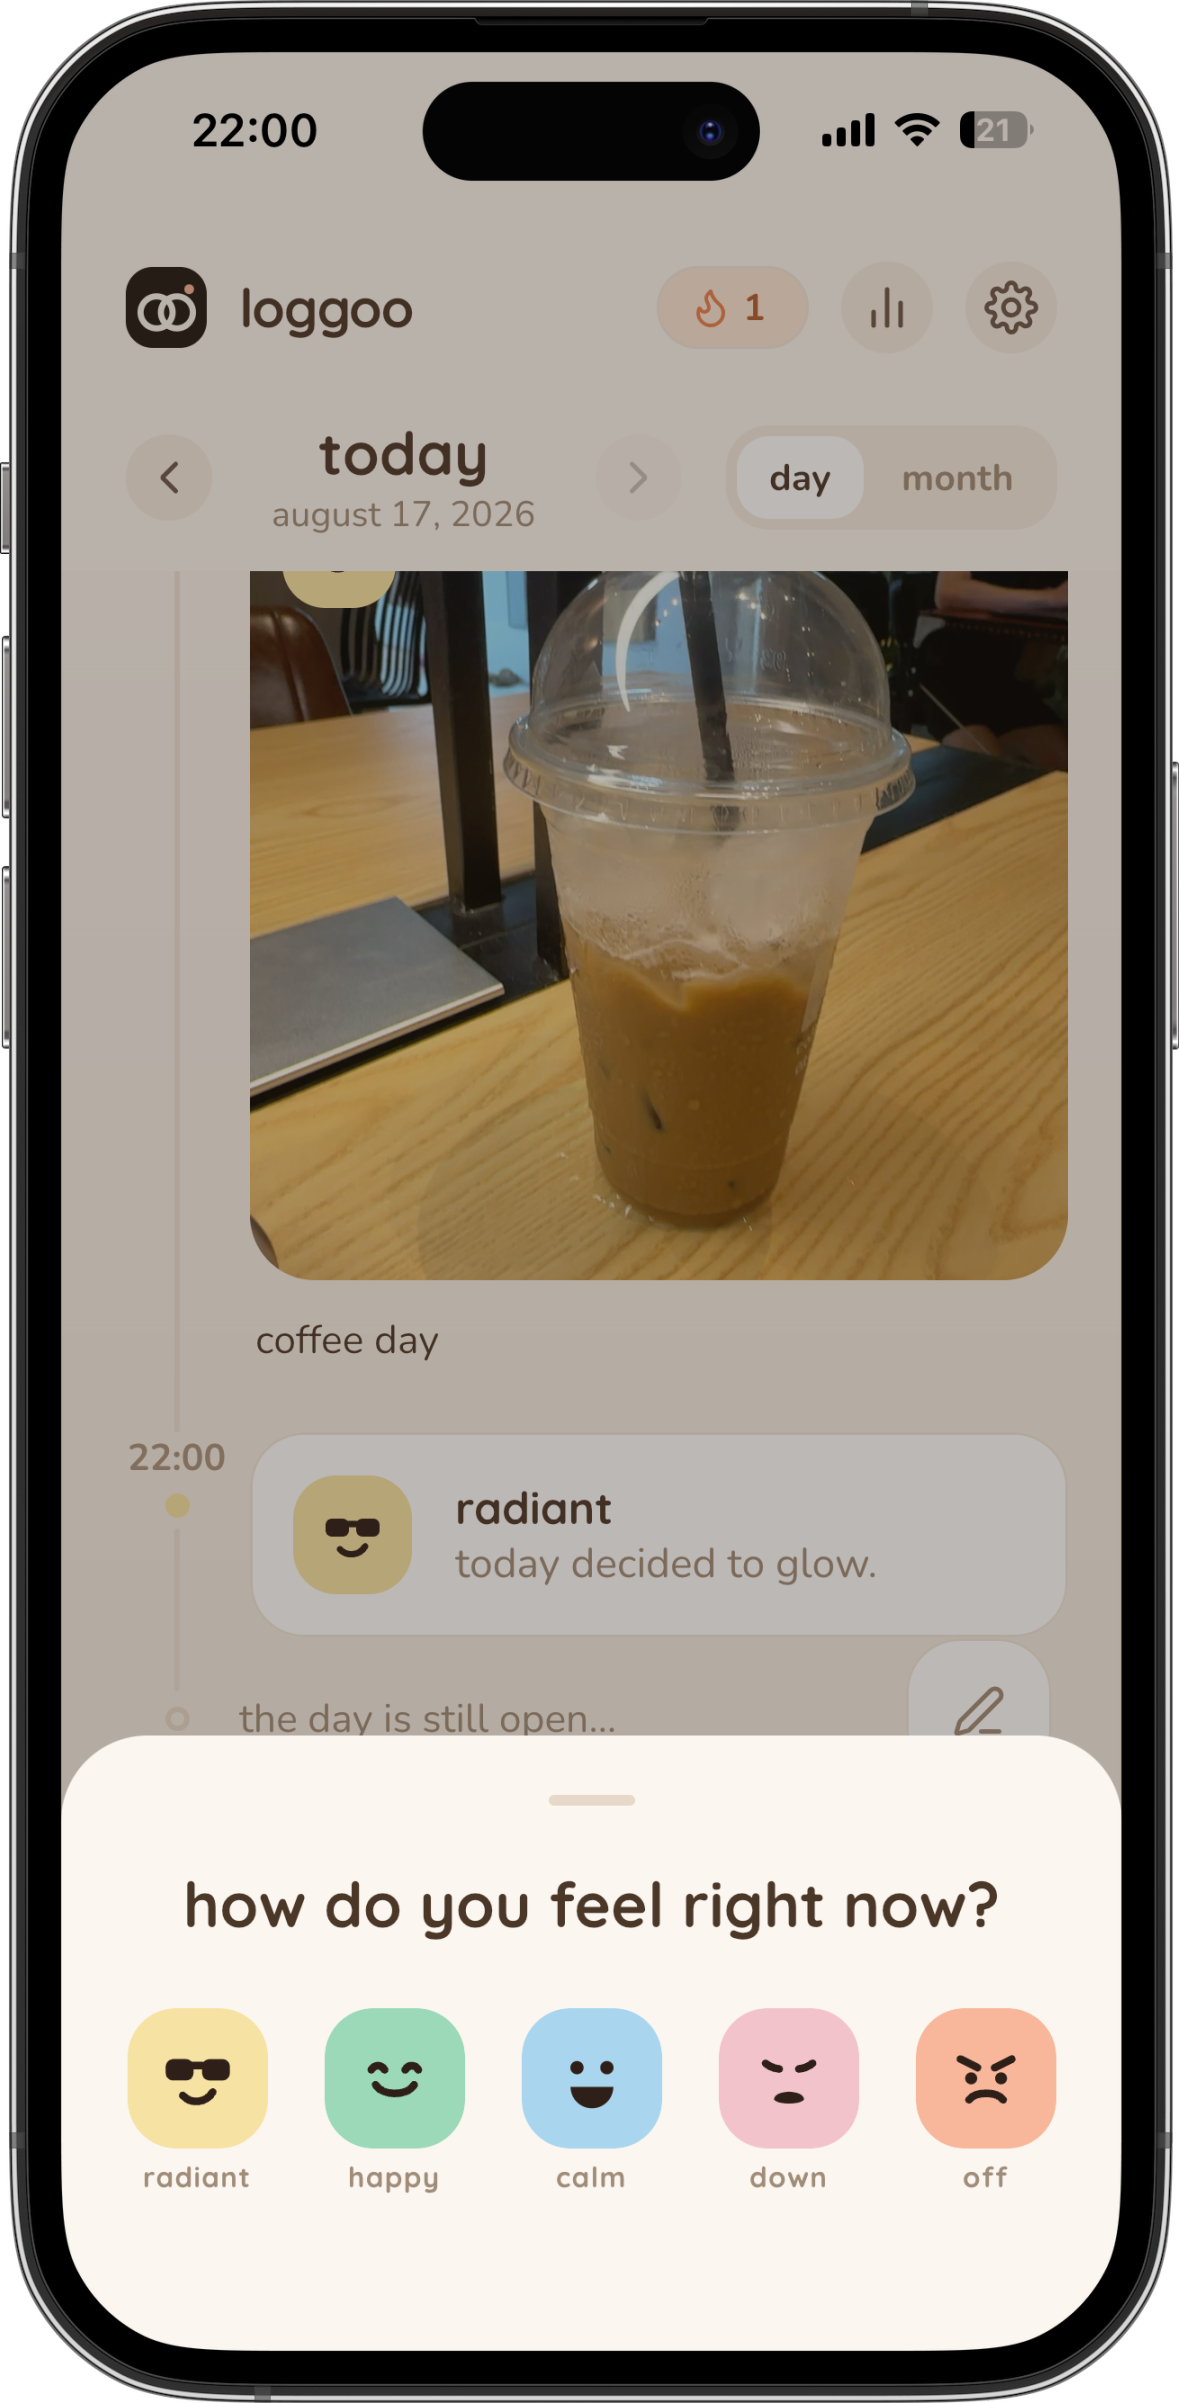
- Step 1: On Home, tap the mood button or “log a mood”.
- Step 2: Choose the face that fits: radiant, happy, calm, normal, down, or off. Loggoo adds it to the selected day immediately.
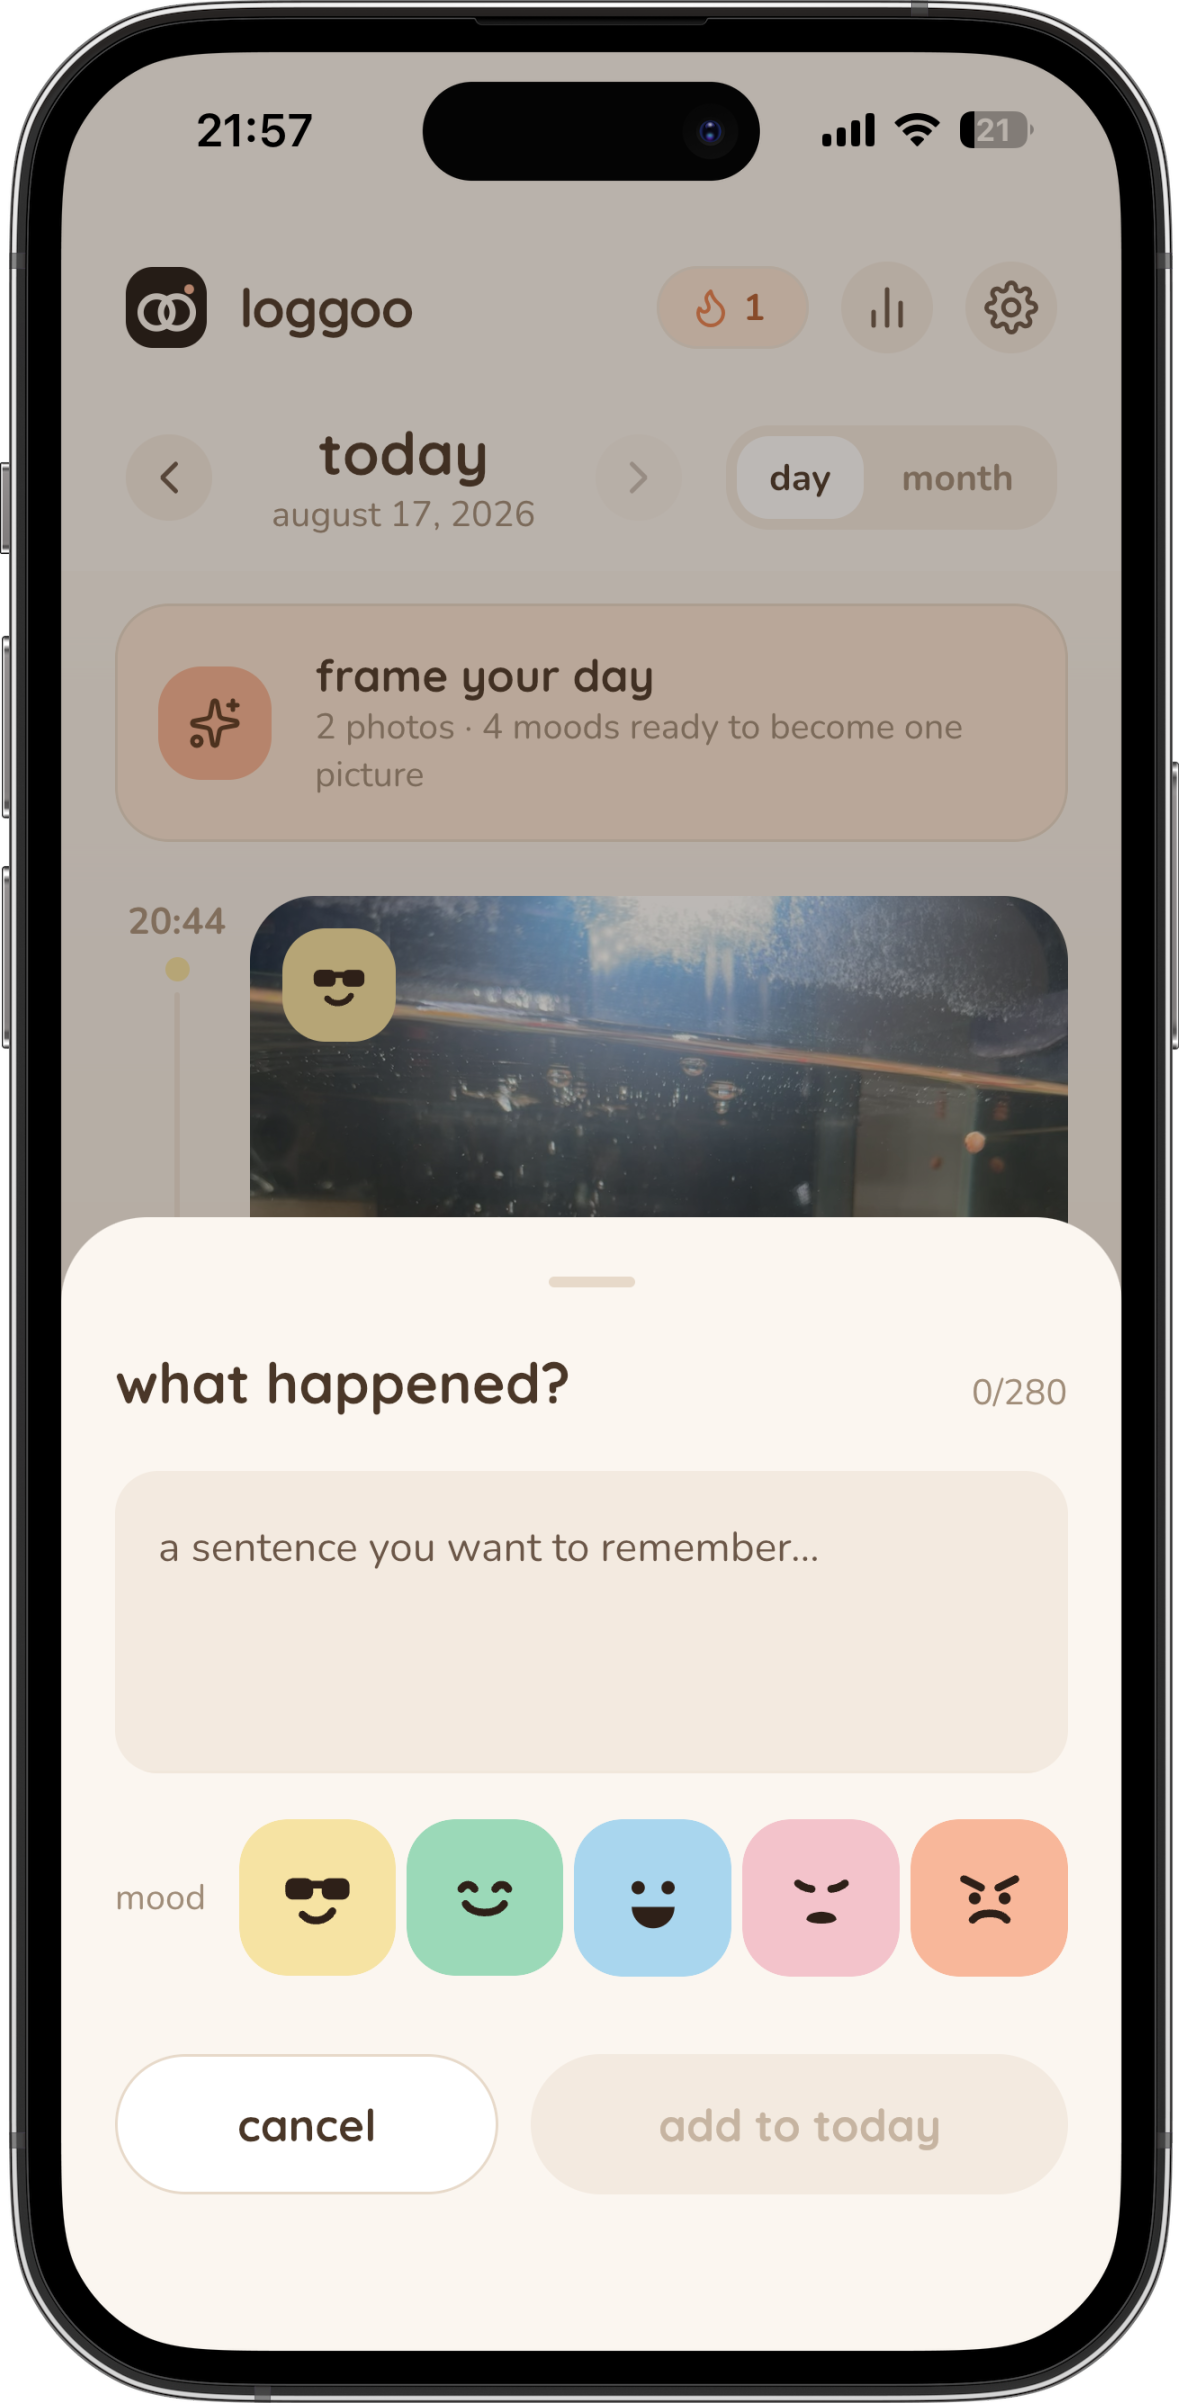
- Step 3: To write instead, tap the note button or “write a note”.
- Step 4: Enter up to the limit shown by the counter, optionally choose a mood, then tap “add to today”.
- Step 5: When viewing an older day, the button reads “add to this day” and the new item stays on that date.
4. Browse and edit your timeline
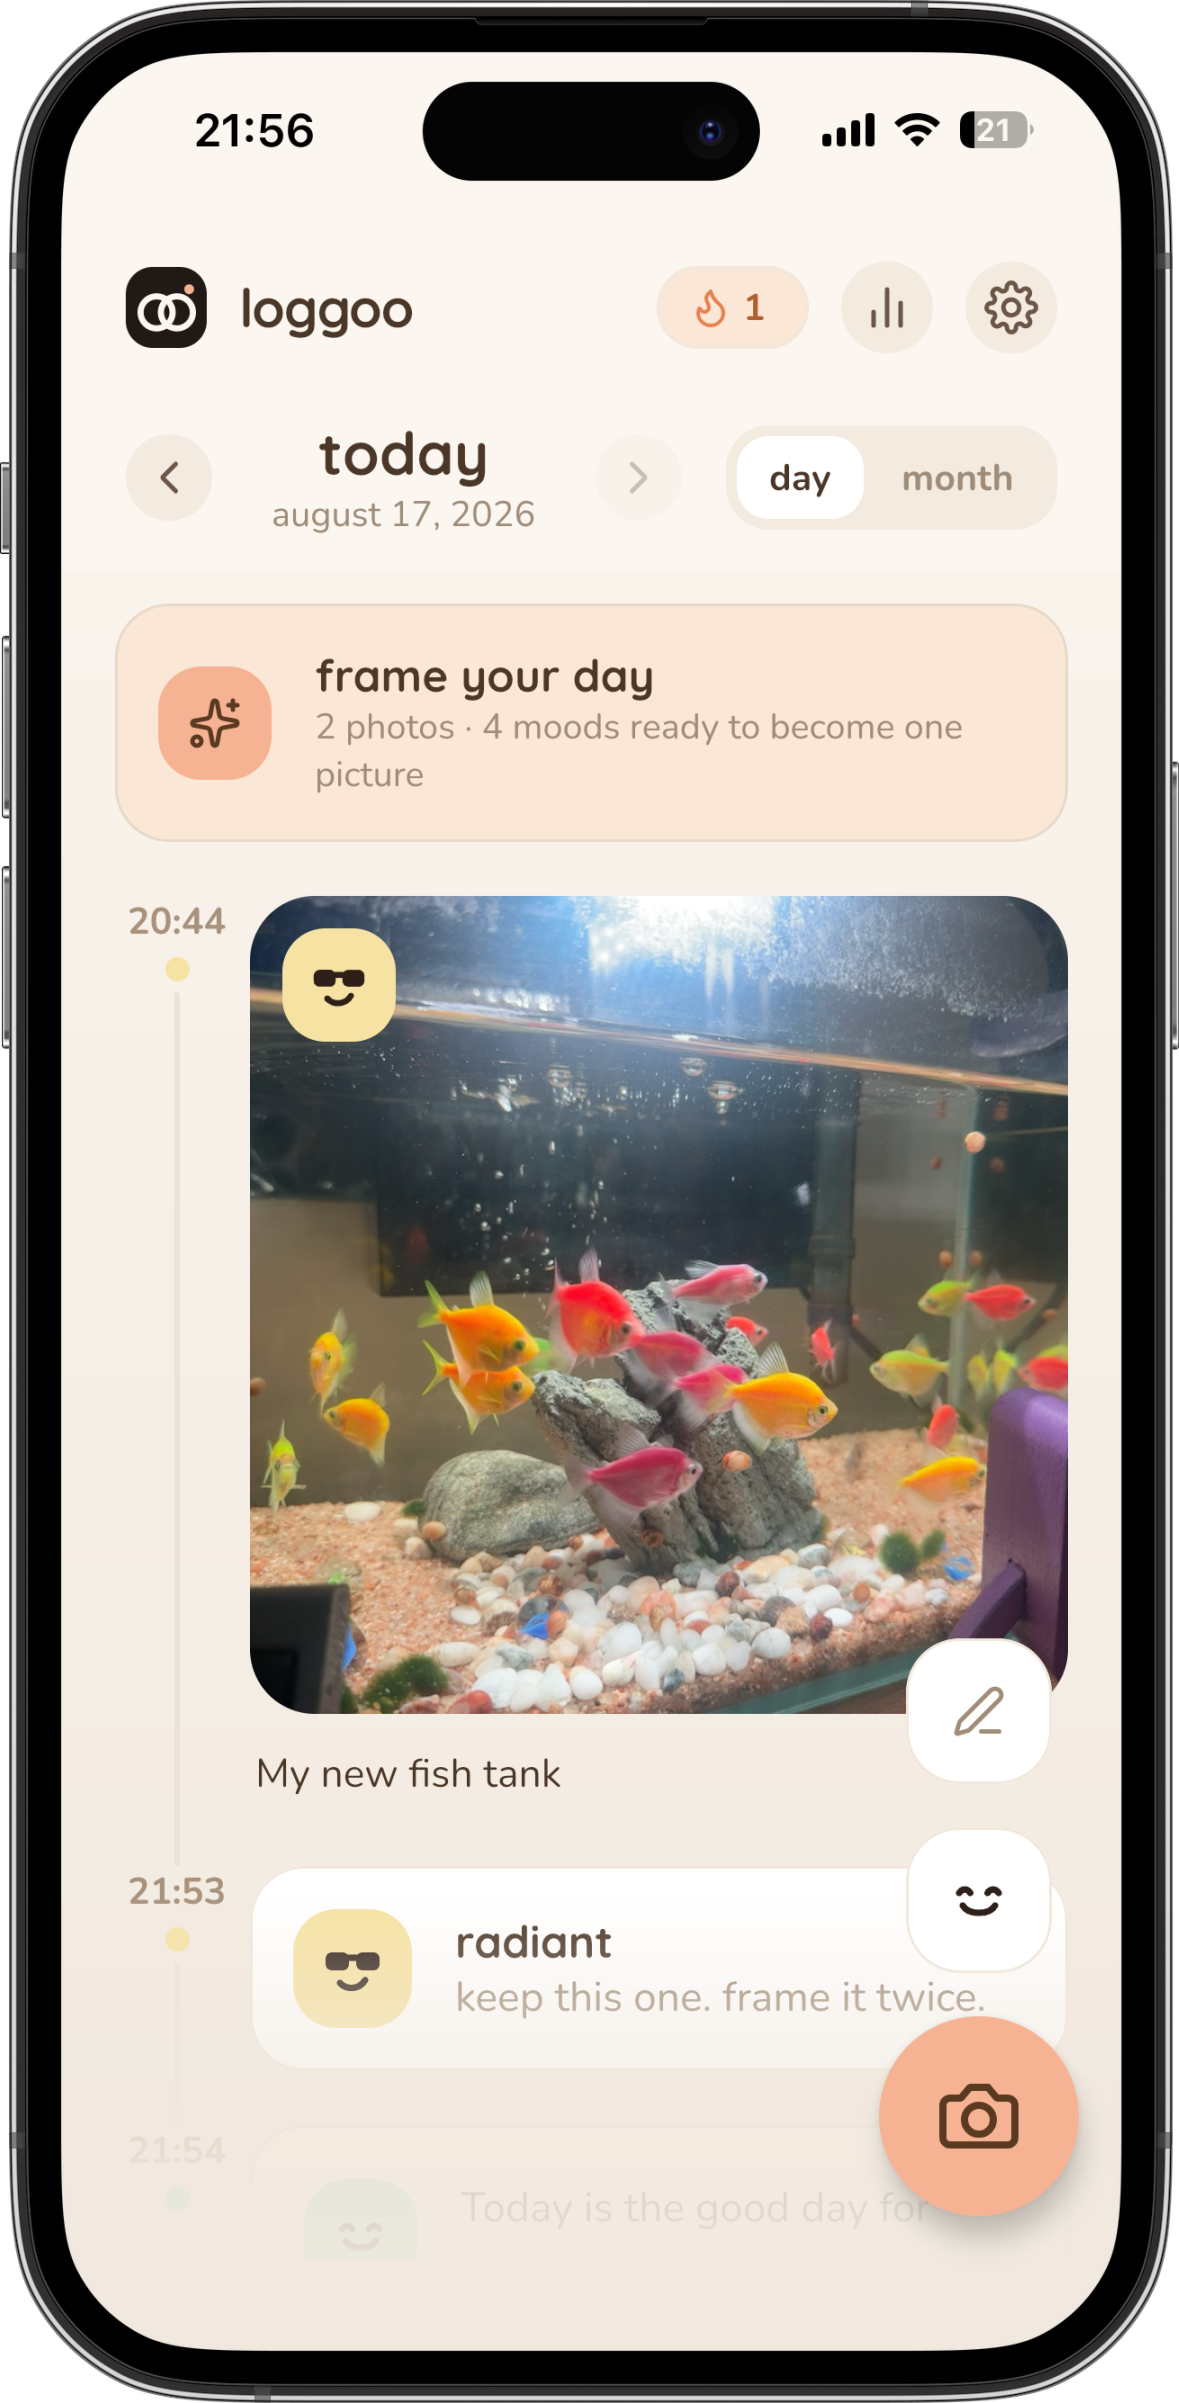
Every photo, video, mood, and note appears in time order on the day timeline.
- Step 1: Tap a photo or video card to open its detail view. Play or mute a video from its controls.
- Step 2: In detail view, tap “save” to copy a photo to Apple Photos, or tap “frame this day” to open Frame Studio.
- Step 3: Press and hold any timeline card to edit it.
- Step 4: Move the moment by 15 minutes, choose a time-of-day shortcut, or tap the time field to set an exact time.
- Step 5: Change its note or mood when those fields are available, then tap “save changes”.
- Step 6: To delete it, tap “remove this moment” and confirm. Removing a moment cannot be undone.
5. Move between days and months
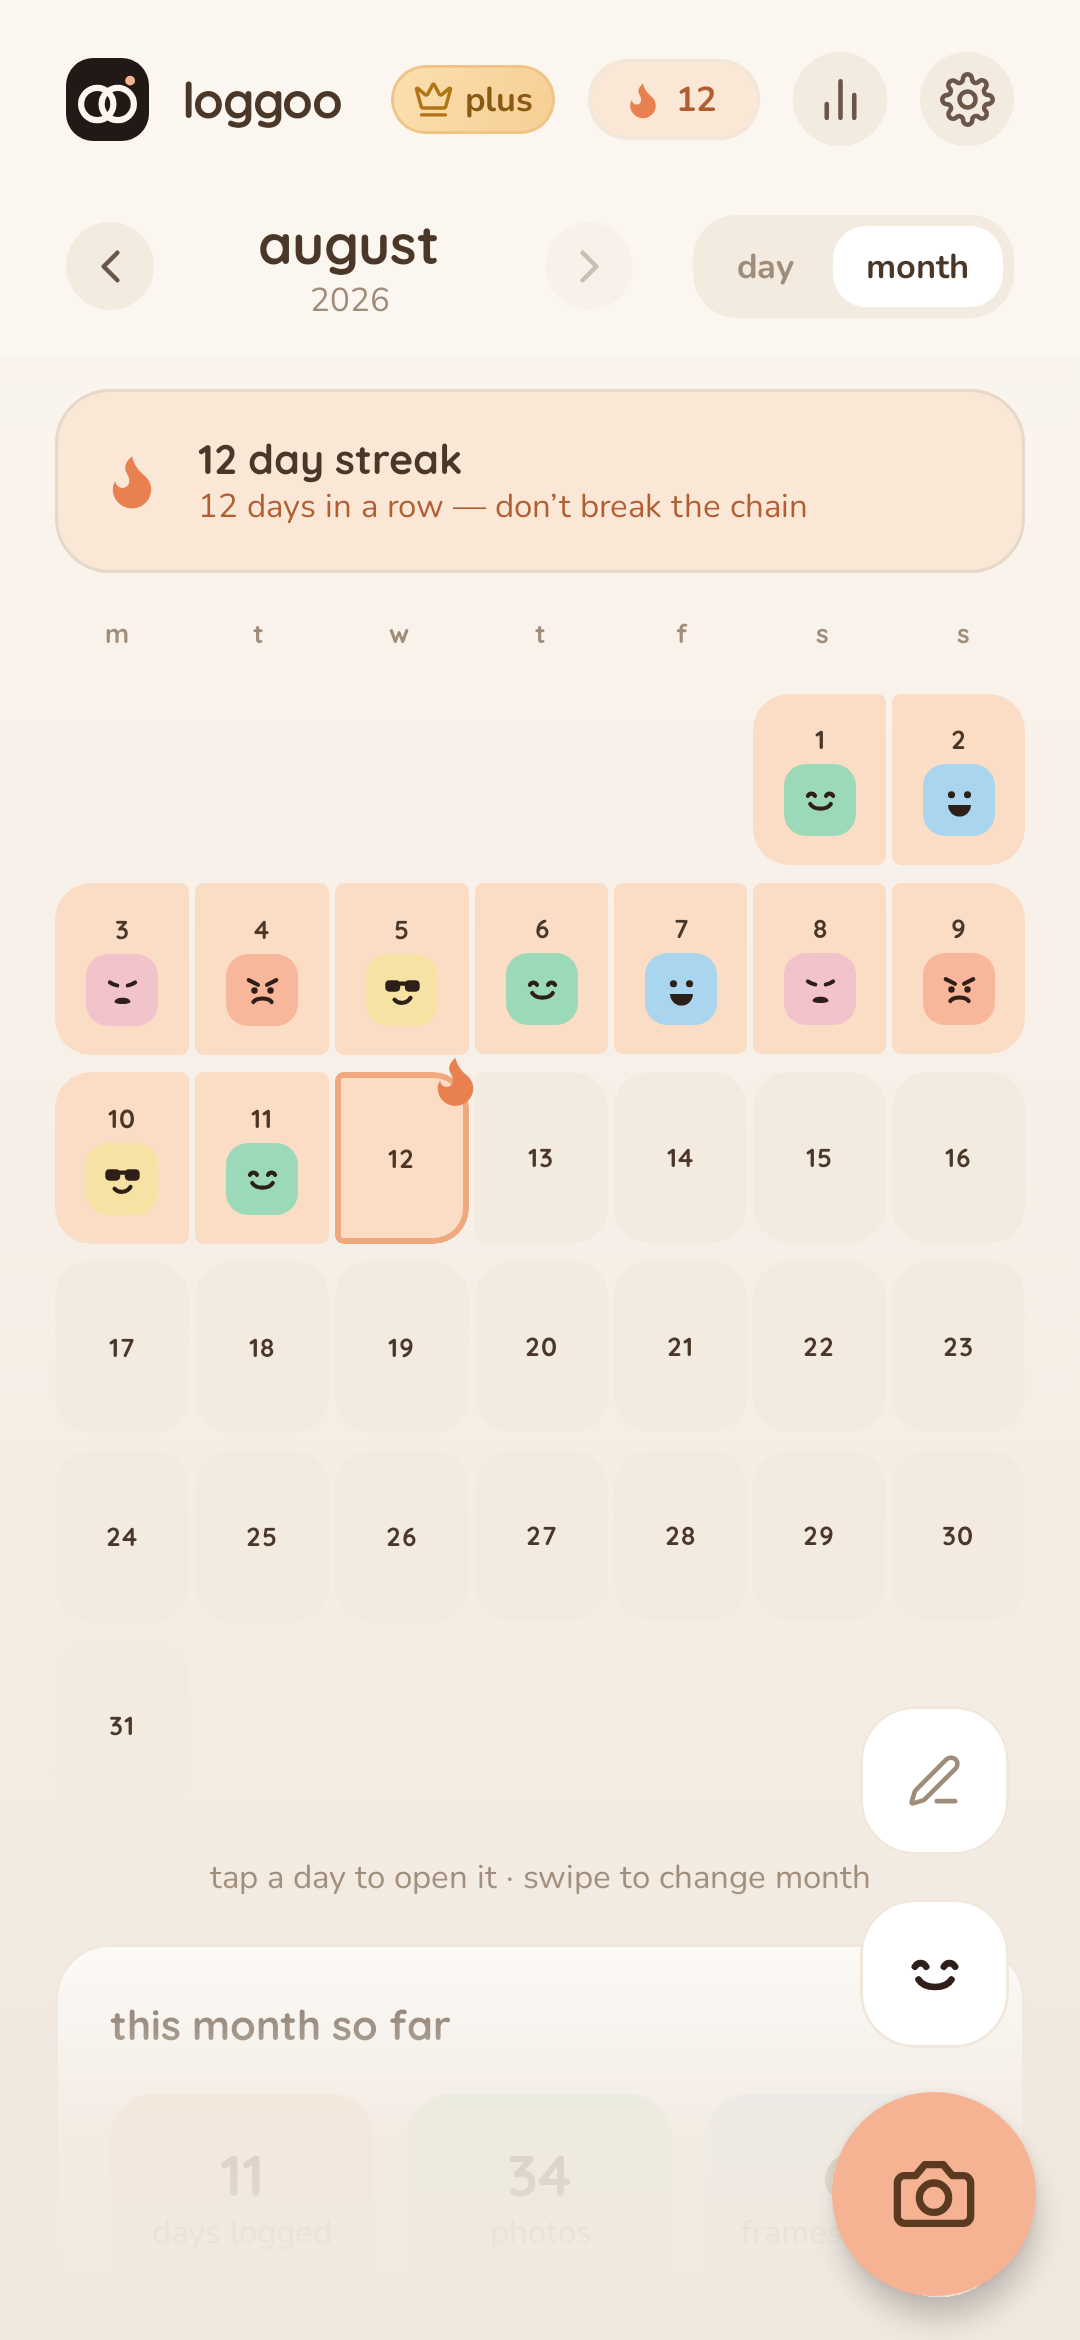
Use the date controls to revisit earlier days or understand your month at a glance.
- Step 1: In day view, tap the left or right arrow beside the date to move one day at a time.
- Step 2: Switch from “day” to “month” to open the calendar.
- Step 3: Tap any date to open that day. Swipe the month view to move between months.
- Step 4: Use the month summary to see days logged, photos saved, and frames made.
- Step 5: Tap the streak chip to see your current run and the days already completed this week.
6. Make and share a frame
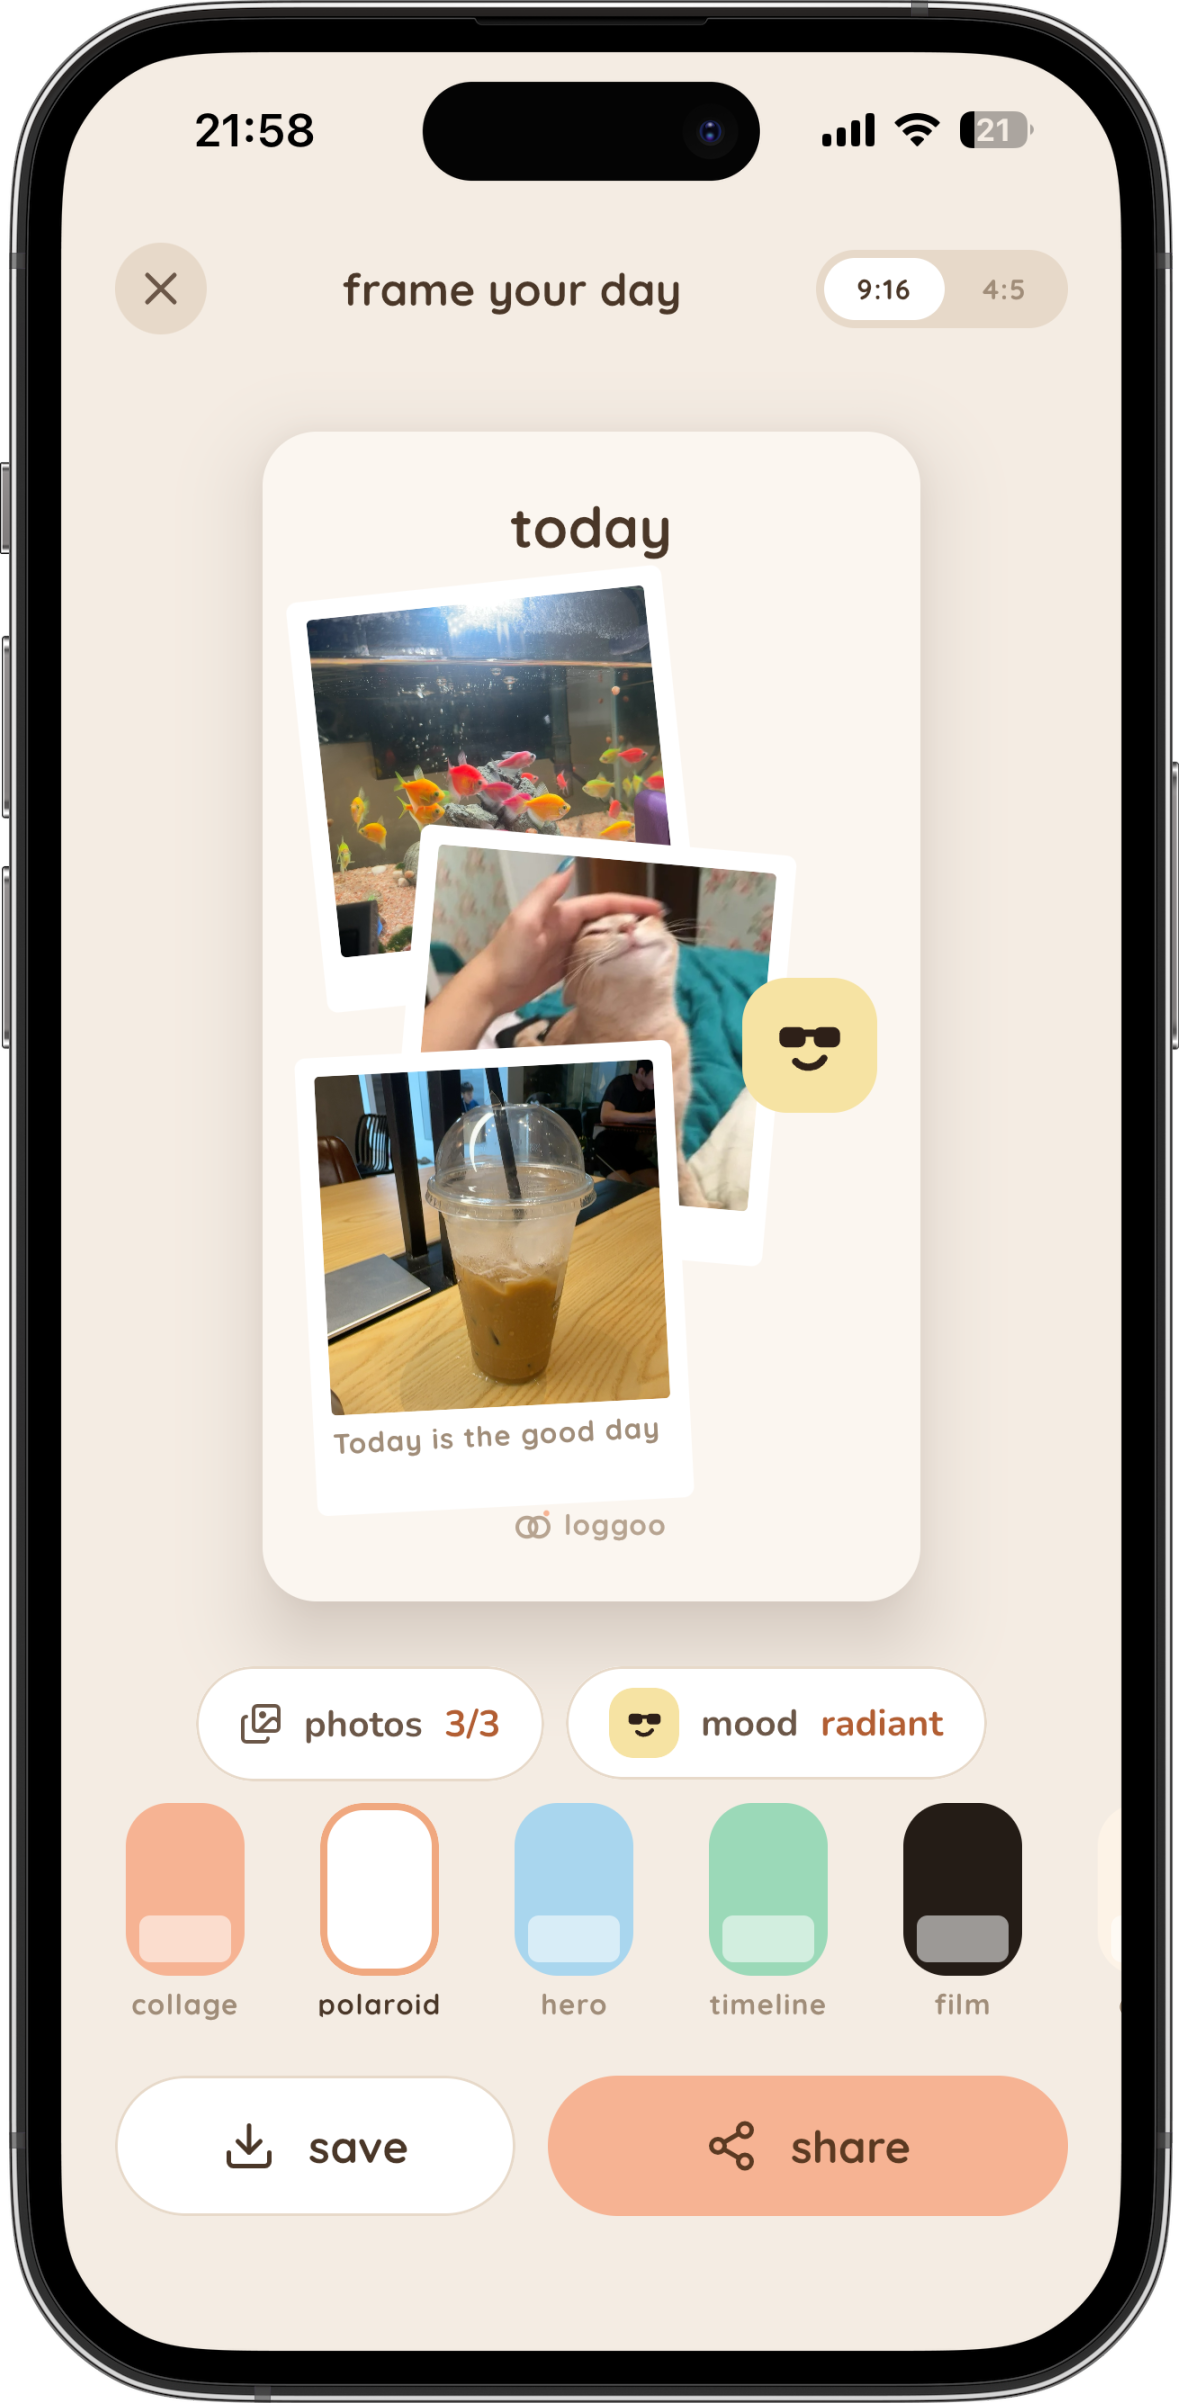
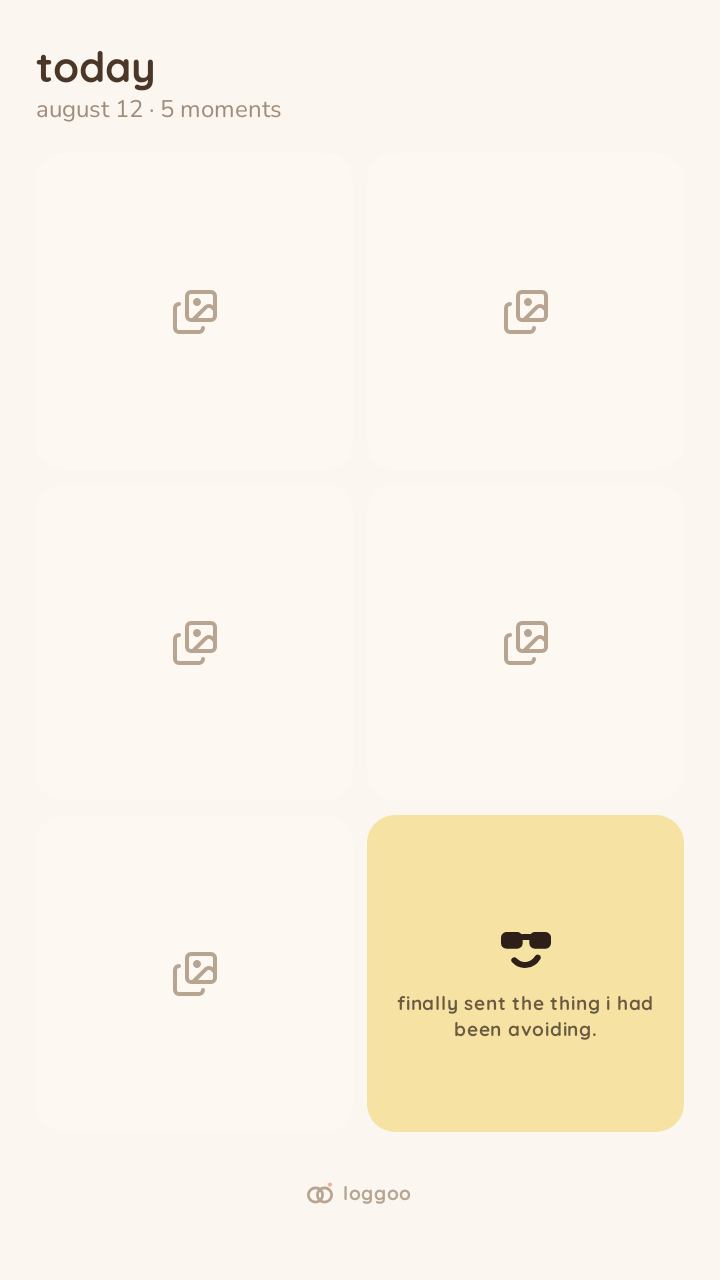
Frame Studio turns one day into a single image for Stories, posts, or your photo library.
- Step 1: Open a day with at least one photo, then tap “frame your day”. You can also use “frame this day” from a moment.
- Step 2: Choose 9:16 for a Story or 4:5 for a post.
- Step 3: Swipe through the template rail and tap a layout to preview it. Crown-marked layouts need Loggoo Plus to save or share.
- Step 4: Tap “photos” to choose which pictures appear. “auto pick” lets Loggoo choose again for you.
- Step 5: Tap “mood” to override the day’s mood for this frame, or choose “auto” to follow your logs.
- Step 6: Tap “save” to add the finished image to Apple Photos, or “share” to open the iOS share sheet.
7. View Mood Trends and Recap
Trends explains patterns in your moods. Recap plays your journal back as a private, on-device story.
- Step 1: Tap the chart button on Home to open “mood trends”. Switch between week and month.
- Step 2: Review your average mood, change from the previous period, mood split, memorable days, observations, and suggested next step.
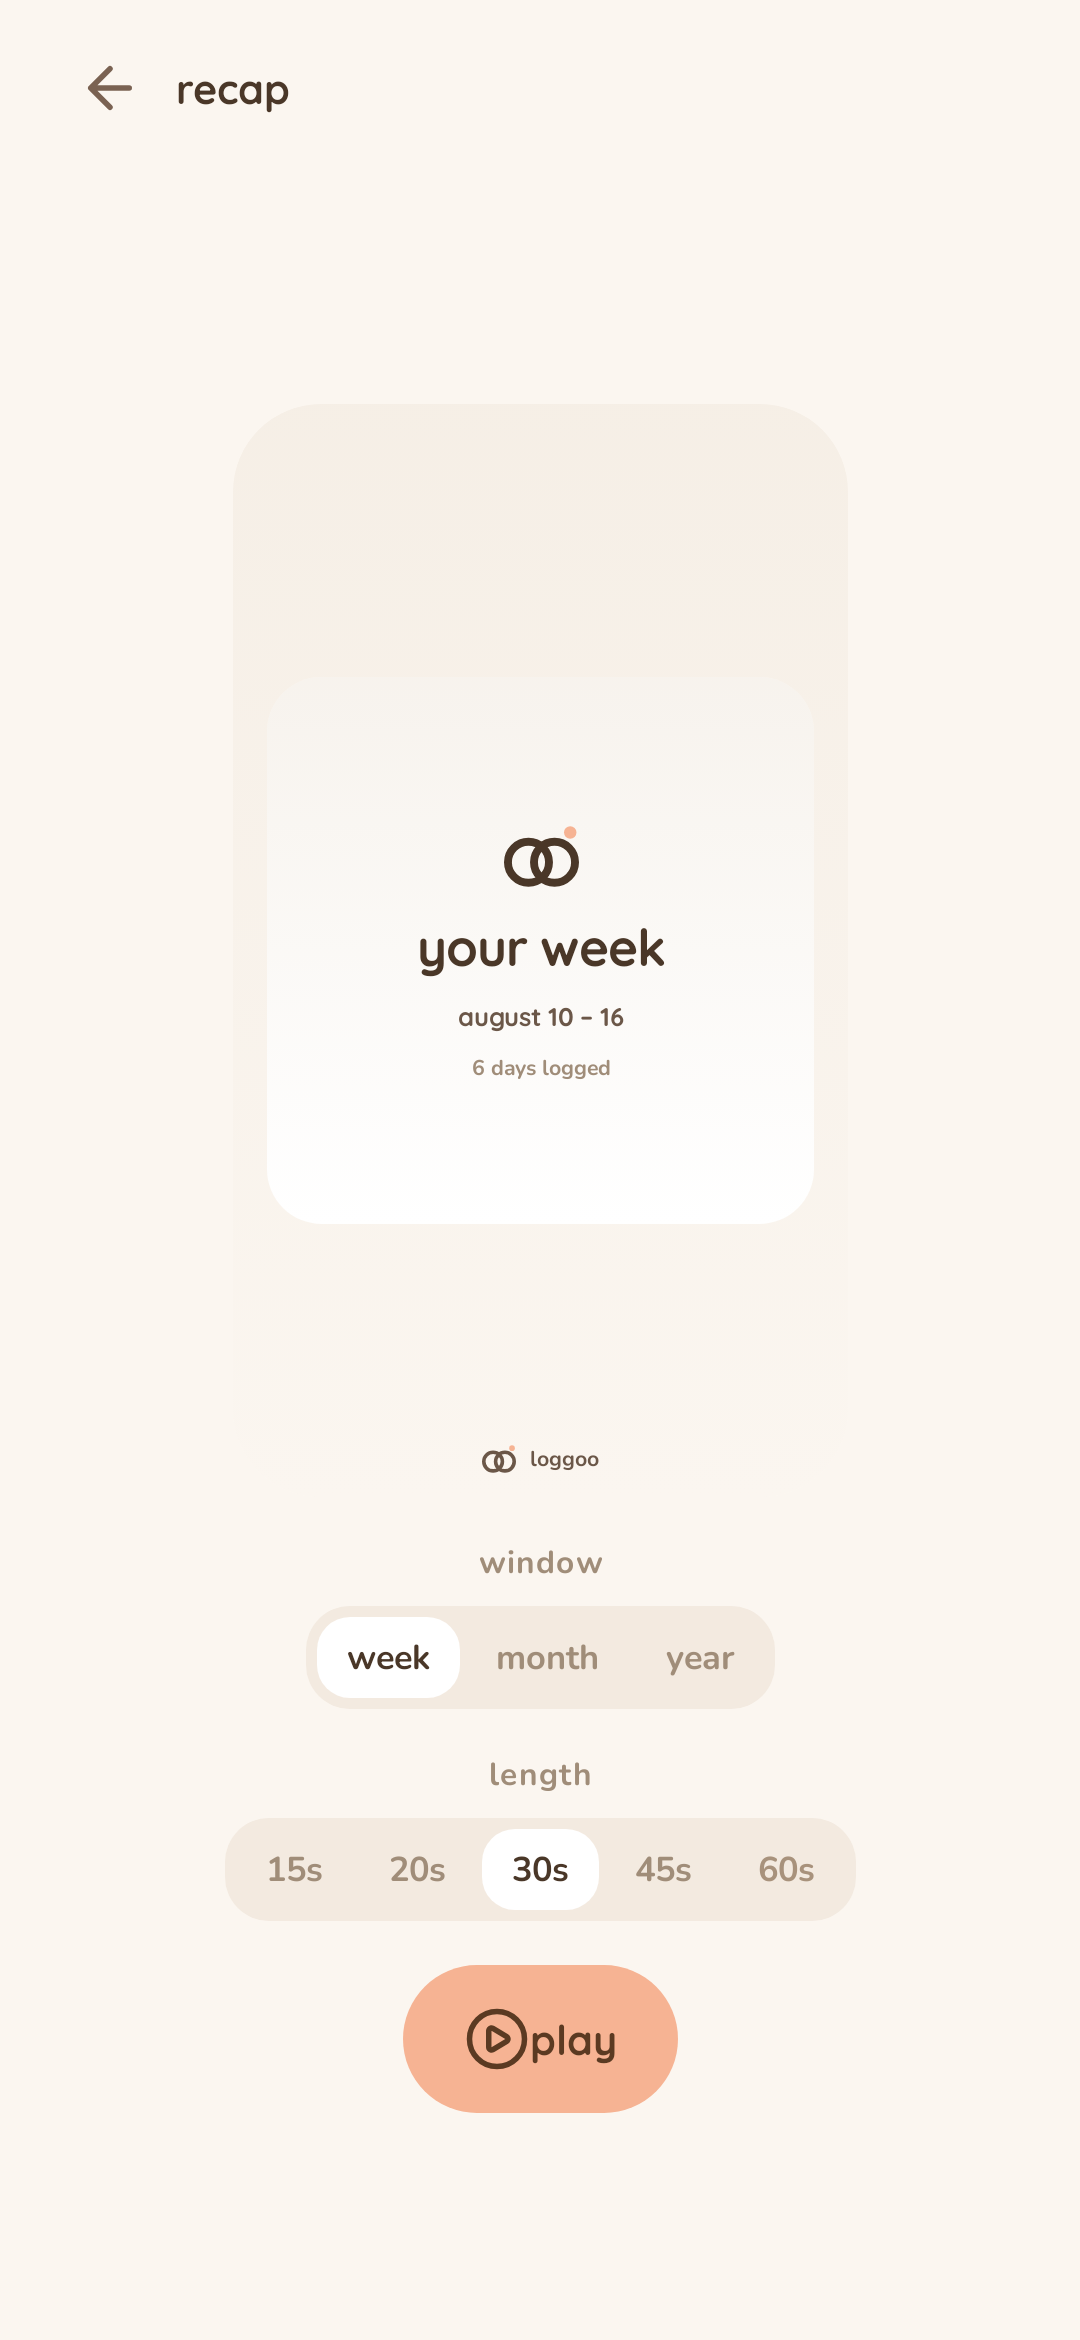
- Step 3: To watch a Recap, tap “your week as a story” when its banner appears on Home.
- Step 4: Choose a week, month, or year window and a 15, 20, 30, 45, or 60 second length. Unavailable lengths need more moments.
- Step 5: Tap “play”. Tap the right side to move forward, the left side to go back, or press and hold to pause.
- Step 6: At the end, tap “play again” to return to the setup.
8. Add a Home Screen Widget
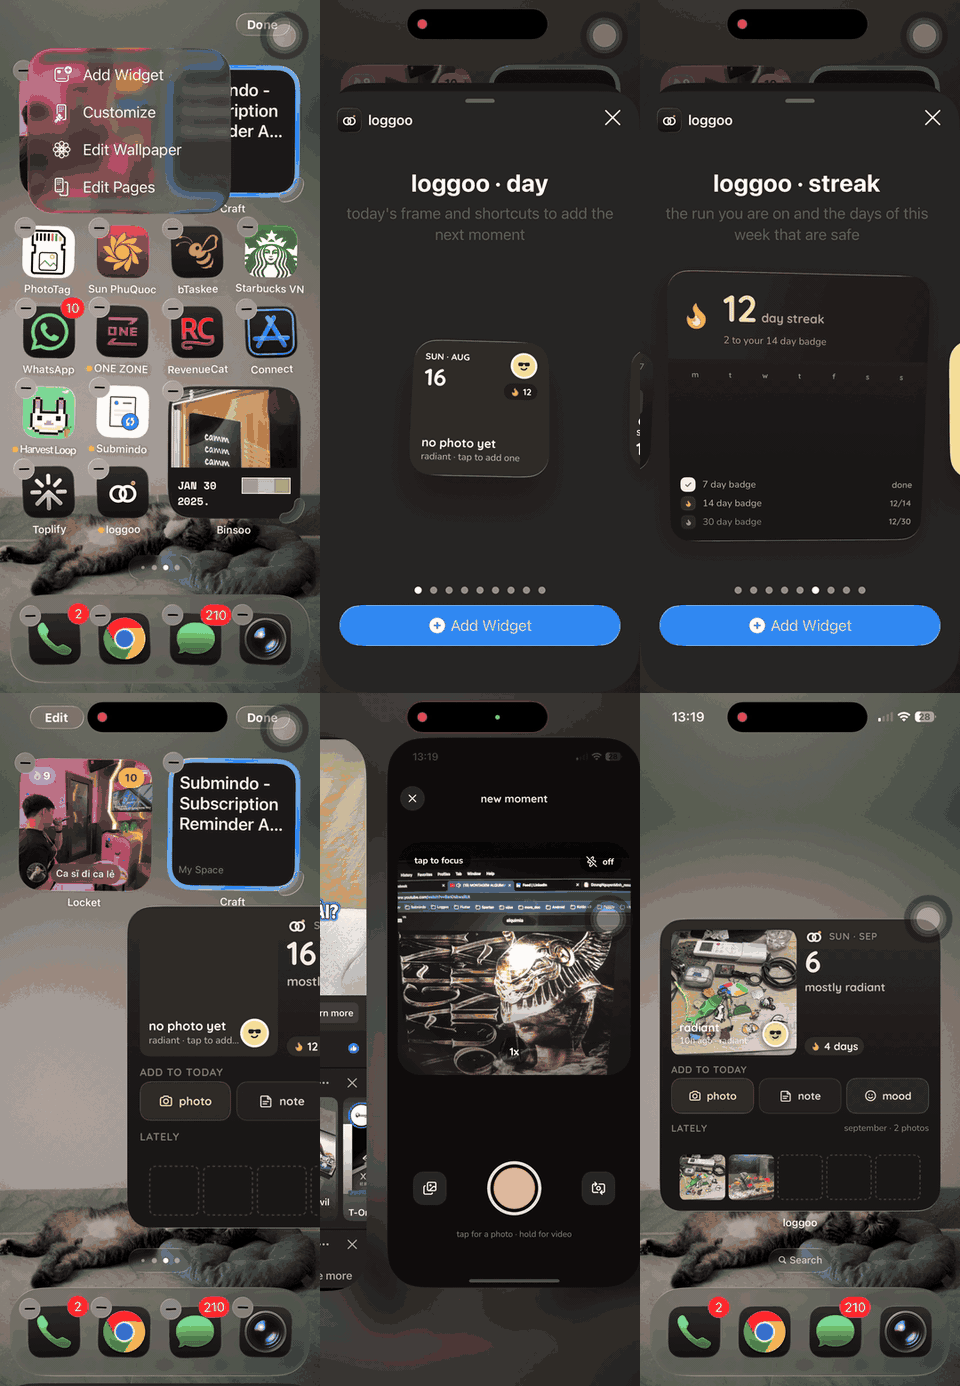
Loggoo has Day, Mood, and Streak widgets. They show your latest journal snapshot and open the app when you tap an action.
- Step 1: Touch and hold an empty area of the iPhone Home Screen until the apps begin to move.
- Step 2: Tap “Edit”, then “Add Widget”. On some iOS versions, tap the plus button instead.
- Step 3: Search for “Loggoo” and select it.
- Step 4: Swipe through Day, Mood, and Streak and their available sizes.
- Step 5: Tap “Add Widget”, move it where you want, then tap “Done”.
- Step 6: On supported larger sizes, tap “photo”, “note”, or “mood” to open that surface in Loggoo. Small widgets open the app without inline actions.
9. Set a daily reminder
Choose one gentle daily check-in time. Loggoo may also remind you about an empty evening or an older memory when notifications are enabled.
- Step 1: Tap the gear on Home to open Settings.
- Step 2: Turn on “notifications” if you want Loggoo to mention an evening that is still empty or a memory from this day in an earlier month or year.
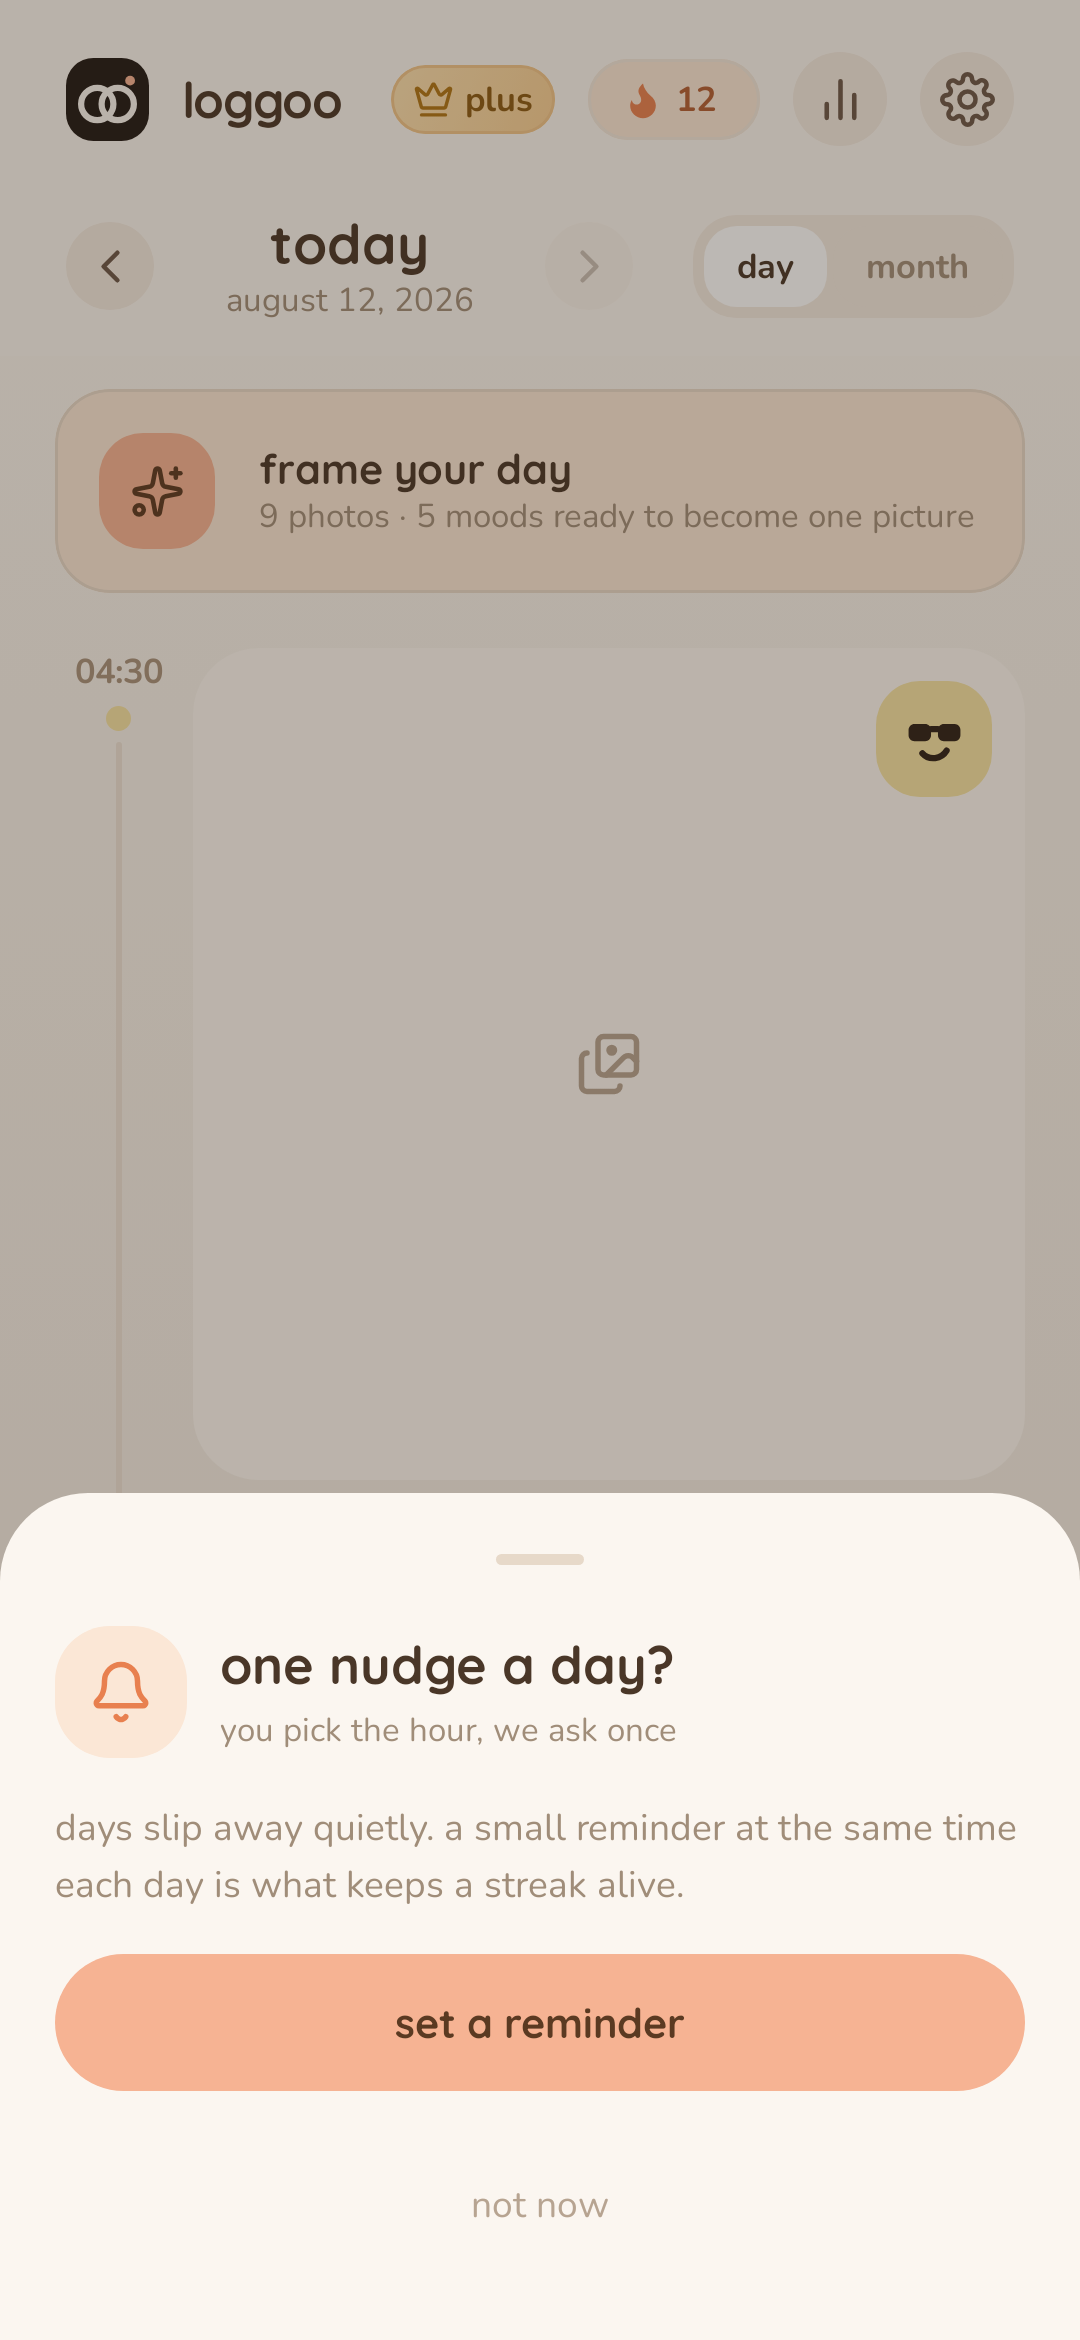
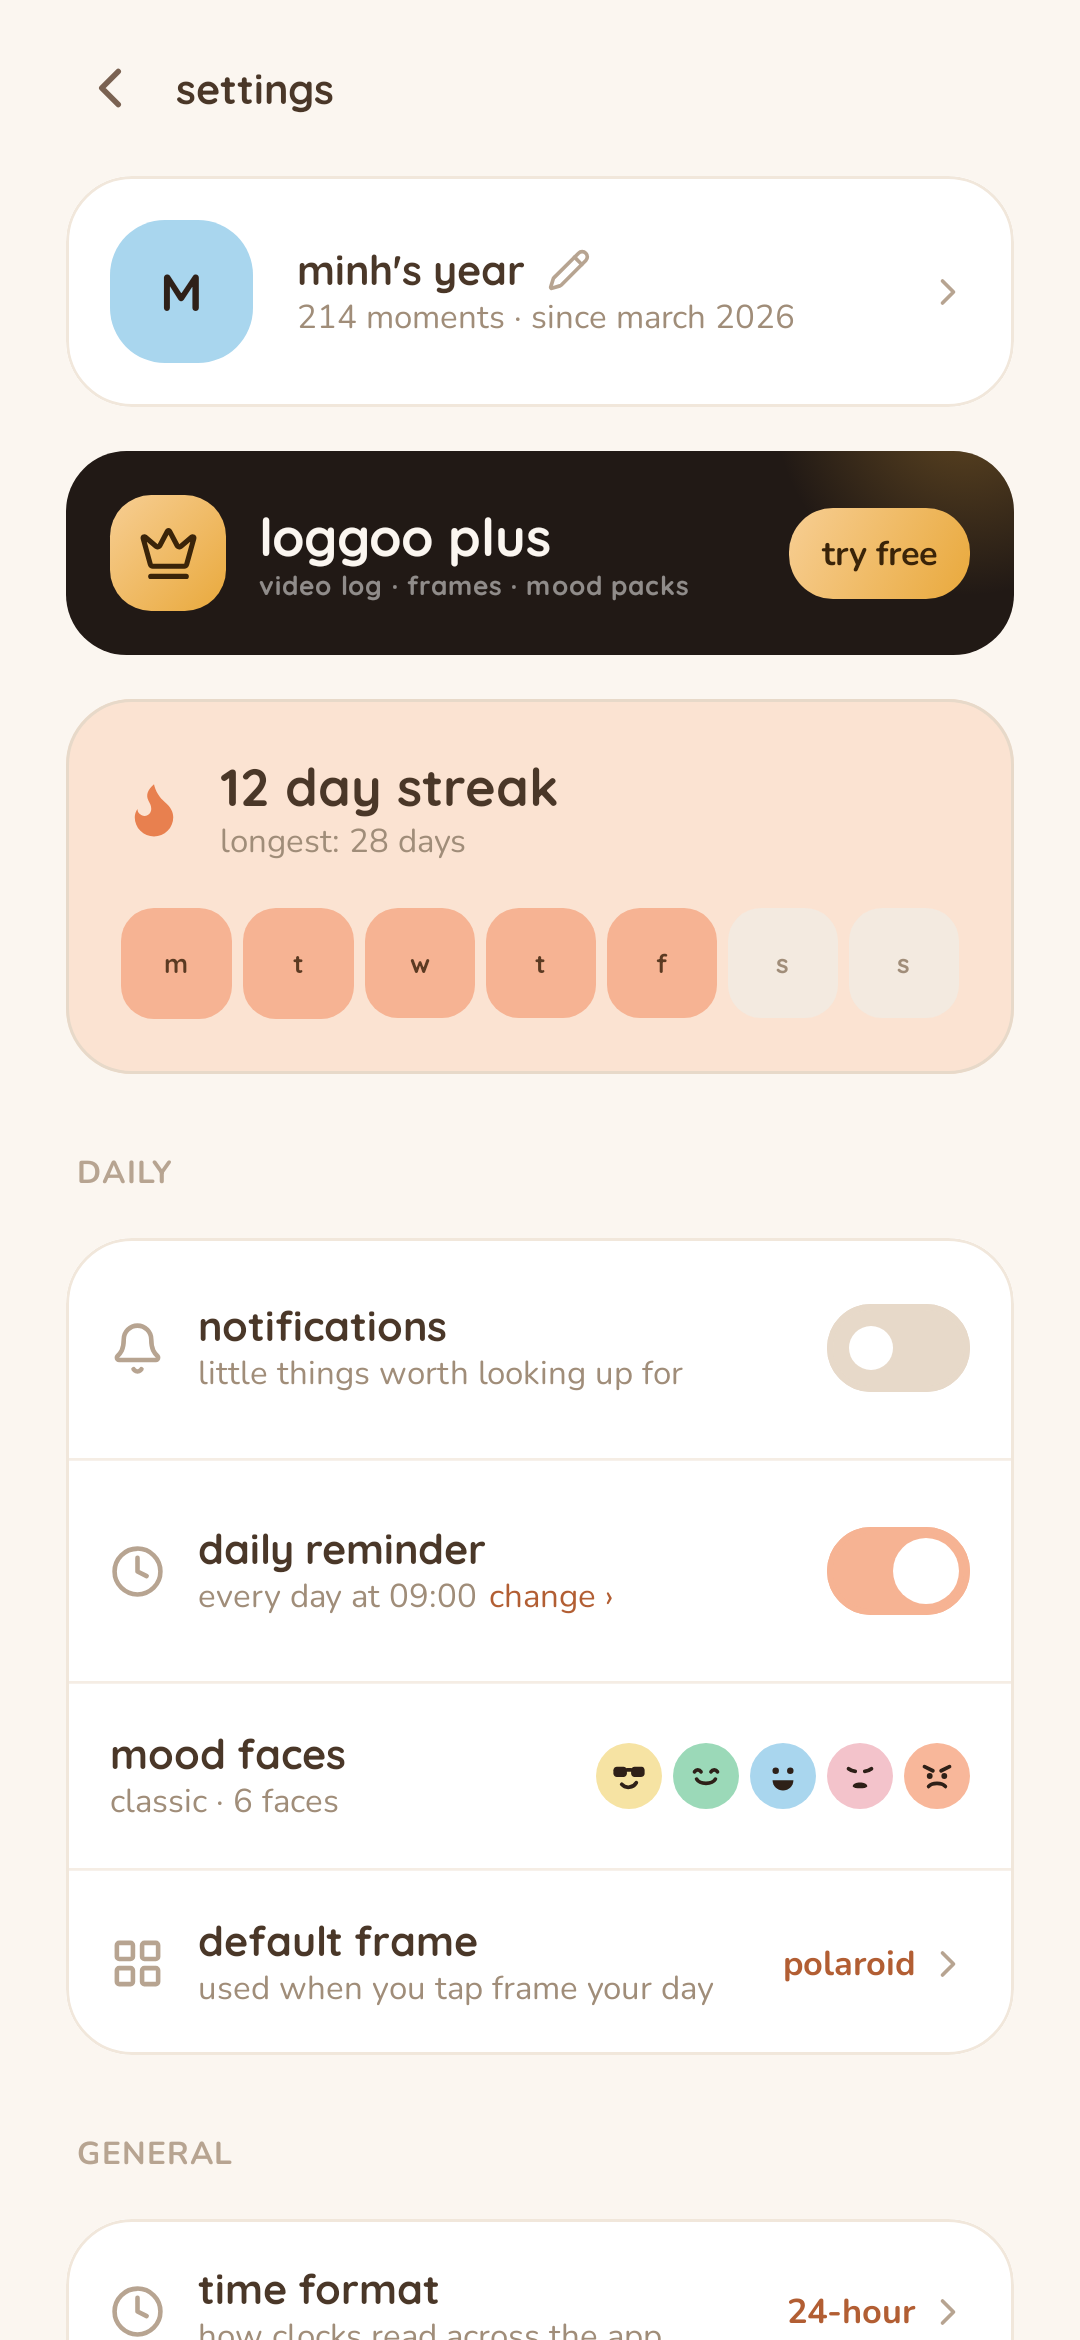
- Step 3: Tap “daily reminder”, choose a time in “pick a reminder time”, then tap “set”. This fixed-time reminder has its own switch.
- Step 4: Allow notifications when iOS asks. The Settings row now shows the scheduled time.
- Step 5: Tap the row again to change the time, or turn its switch off to stop the daily reminder.
- Step 6: You can also accept “one nudge a day?” after your first log and choose the time without leaving Home.
10. Personalize Loggoo
Settings controls how the journal looks, feels, and labels time throughout the app.
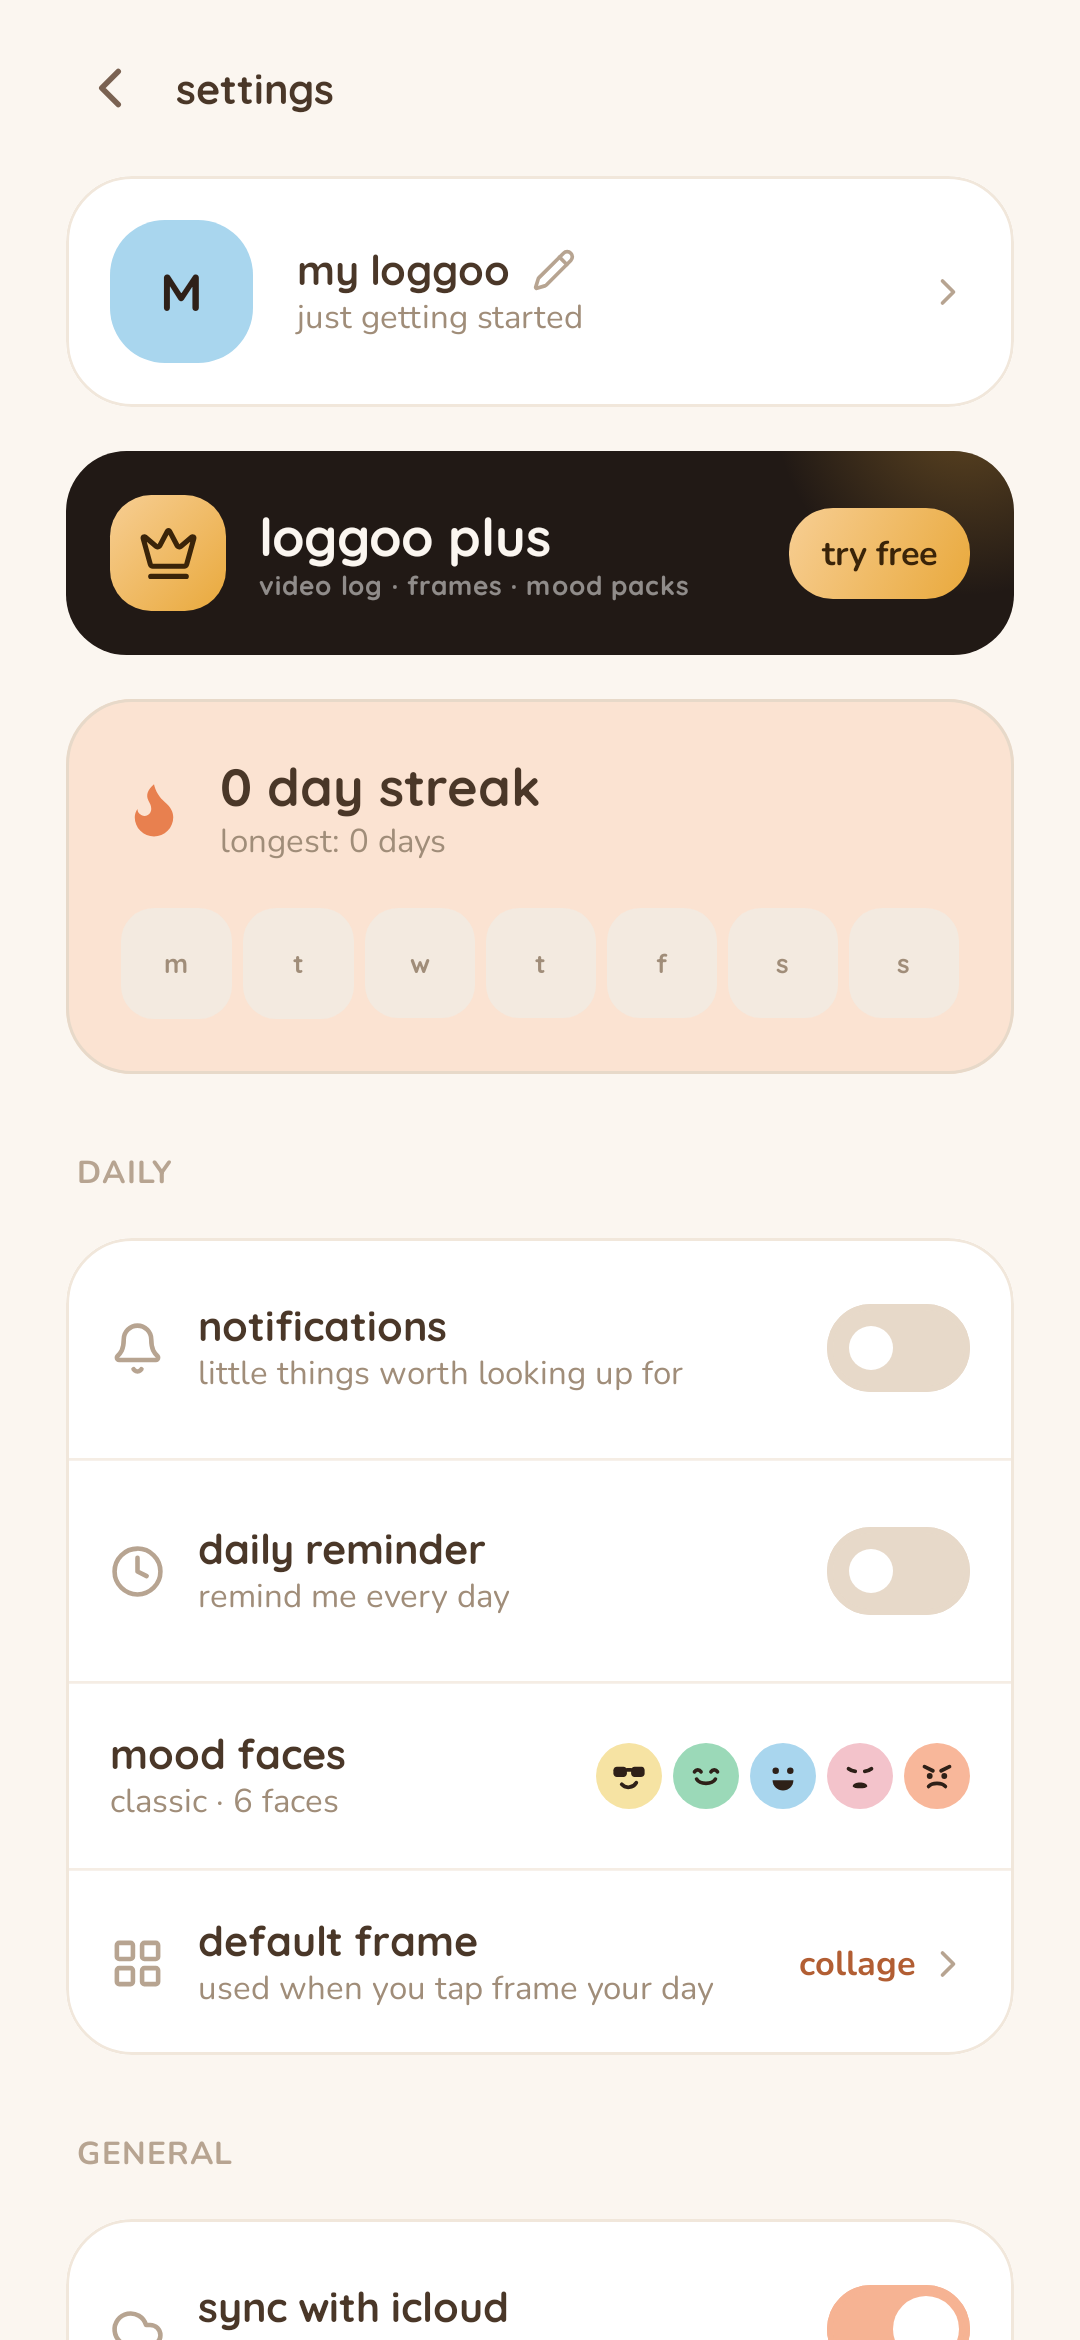
- Step 1: Tap the gear on Home to open Settings, then tap the album card to rename “my loggoo”. This name appears on frames and exports.
- Step 2: Tap “mood faces” to preview all 15 packs. Classic is free; the other packs require Plus and update faces and mood colors across the app and widgets.
- Step 3: Tap “default frame” to choose the layout Frame Studio opens with. Locked defaults require Plus.
- Step 4: Tap “time format” to switch between 12-hour and 24-hour clocks.
- Step 5: Tap “week starts” to switch between Monday and Sunday.
- Step 6: Use “haptics” to turn Loggoo’s confirmation taps on or off.
- Step 7: Use the About rows to visit the website, read the legal pages, follow Loggoo, or rate the app.
11. iCloud sync and Loggoo Plus
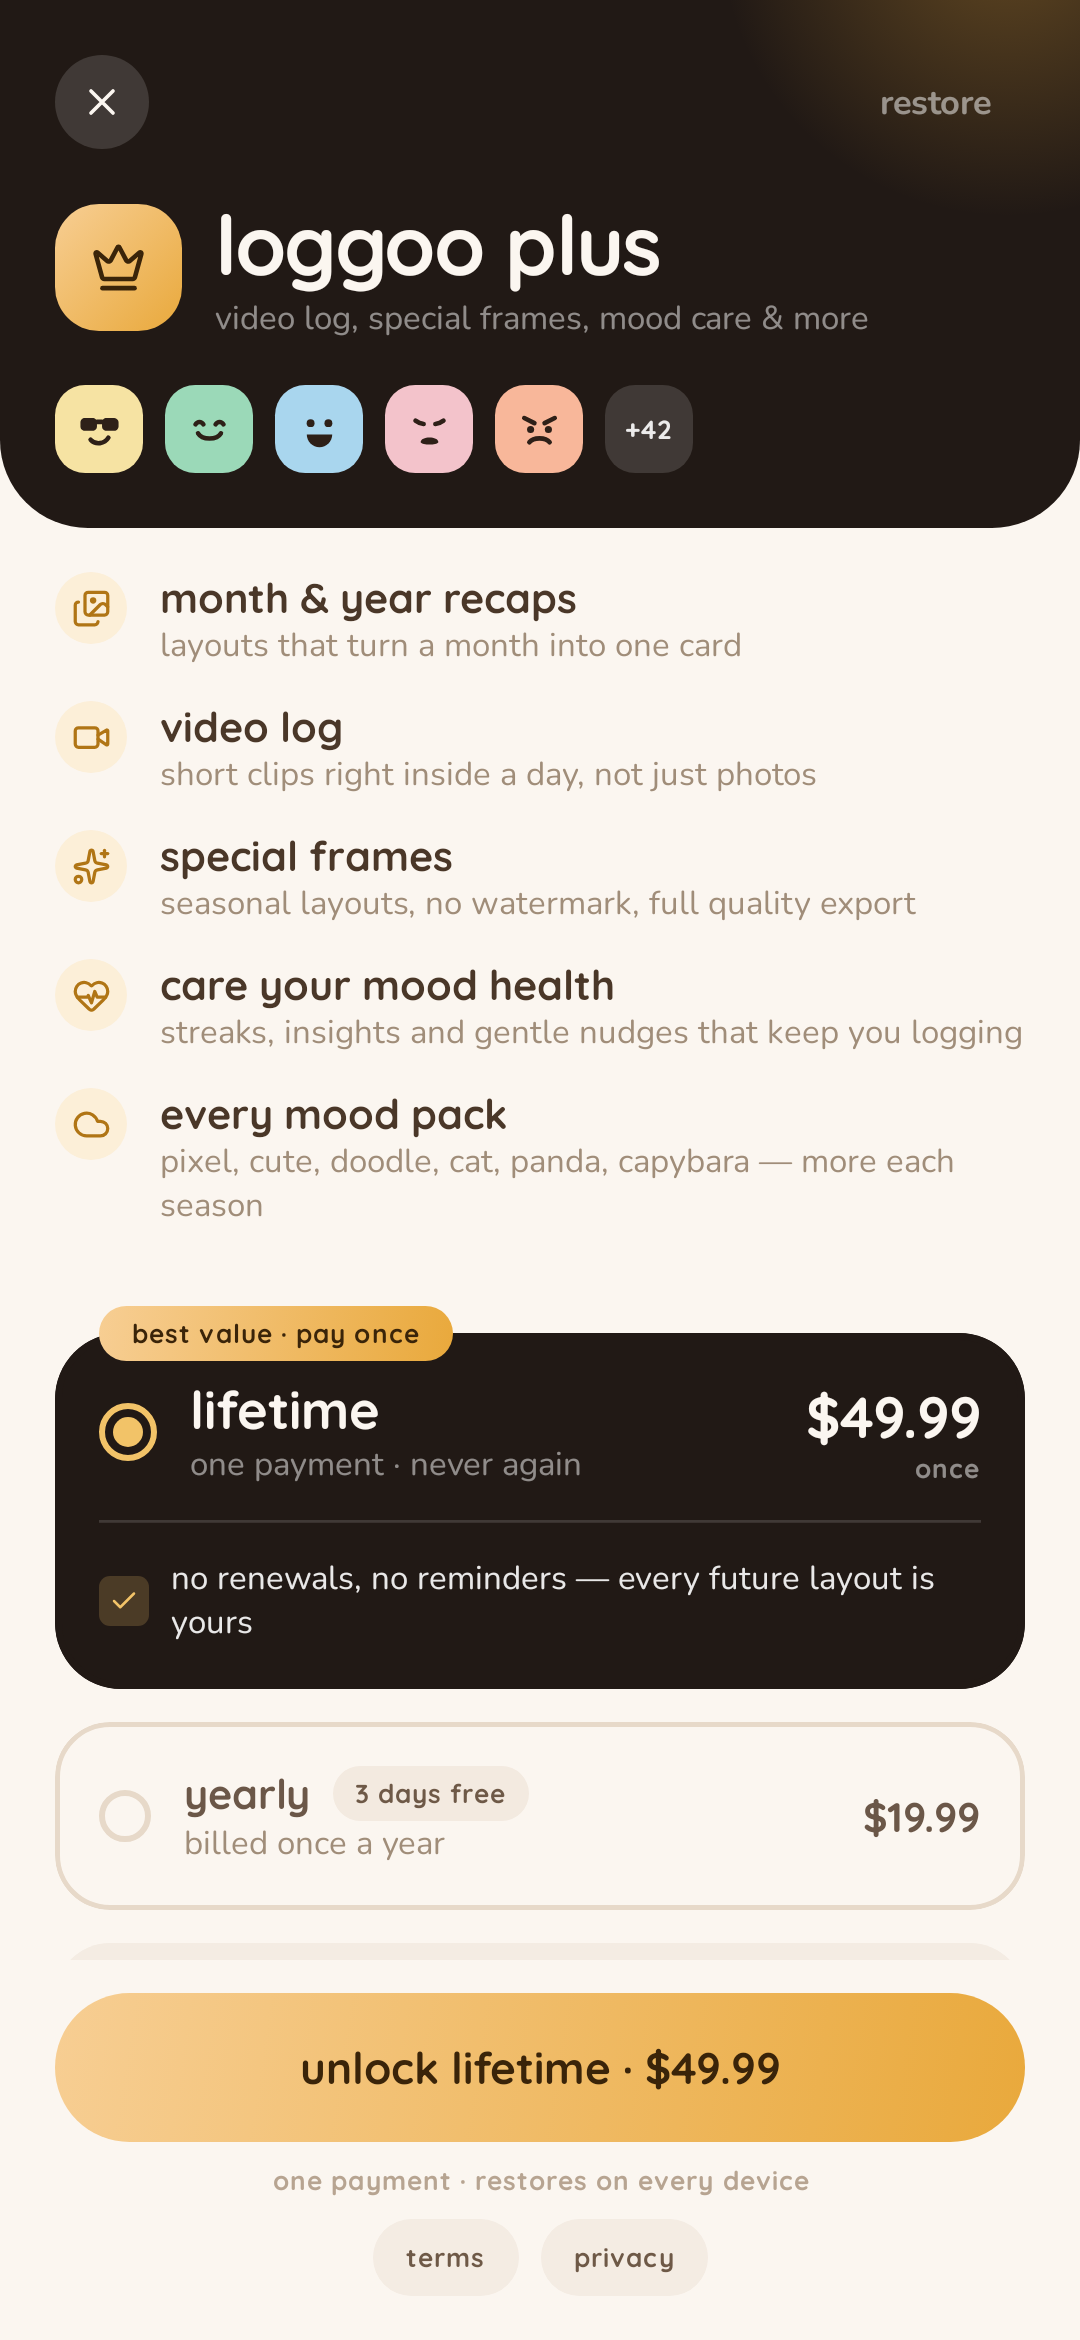
Plus unlocks video logging, premium frames and mood packs, Mood Trends, widgets, and iCloud sync.
- Step 1: Tap the “loggoo plus” card in Settings to view the plans available for your App Store account.
- Step 2: Choose a plan and follow the App Store purchase sheet. Prices and renewal terms shown there come from Apple.
- Step 3: If you already purchased Plus with the same Apple ID, open the paywall and tap “restore”.
- Step 4: To sync, open Settings and tap “sync with icloud”, then turn it on.
- Step 5: Check the status in the iCloud sheet. Tap “sync now” when you want to request an immediate refresh.
- Step 6: Enable sync on your other Apple device while signed in to the intended iCloud account.
12. Troubleshooting and privacy
Most problems come from an iOS permission, a missing local media file, or a store/iCloud connection.
- Step 1: Camera unavailable: open iOS Settings › Apps › Loggoo › Camera and enable access, then return and tap “Retry camera”.
- Step 2: Cannot choose or save photos: check Loggoo’s Photos permission in iOS Settings and try again.
- Step 3: No notifications: enable Allow Notifications for Loggoo, then confirm your reminder time inside the app.
- Step 4: Plus not recognized: confirm the correct Apple ID, connect to the internet, then tap “restore” on the paywall.
- Step 5: iCloud paused: make sure iCloud Drive is on, check the Apple ID shown by iOS, then return to Loggoo and use “sync now”.
- Step 6: A photo says it is no longer on this device: the timeline record still exists, but the private media file is missing and cannot be displayed.
- Step 7: Before deleting a moment, remember that “remove” is permanent. Save or share anything you want to keep first.